In this guide we’ll show you how to add a preset subject with title and URL merge tags to your Chaty email channel.
The idea of the feature is that the preset subject will automatically appear in the email subject line when your website visitors click on the channel to send you an email. You can also use merge tags to add the URL or the title of the page your website visitor sent the email from. For example, you can add the URL of a product to the email so that you know which product your customer is referring to when they contact you.
Step 1: Let’s get started. Start by opening your Chaty dashboard and click on Widgets. Click on Edit next to the widget you wish to edit.
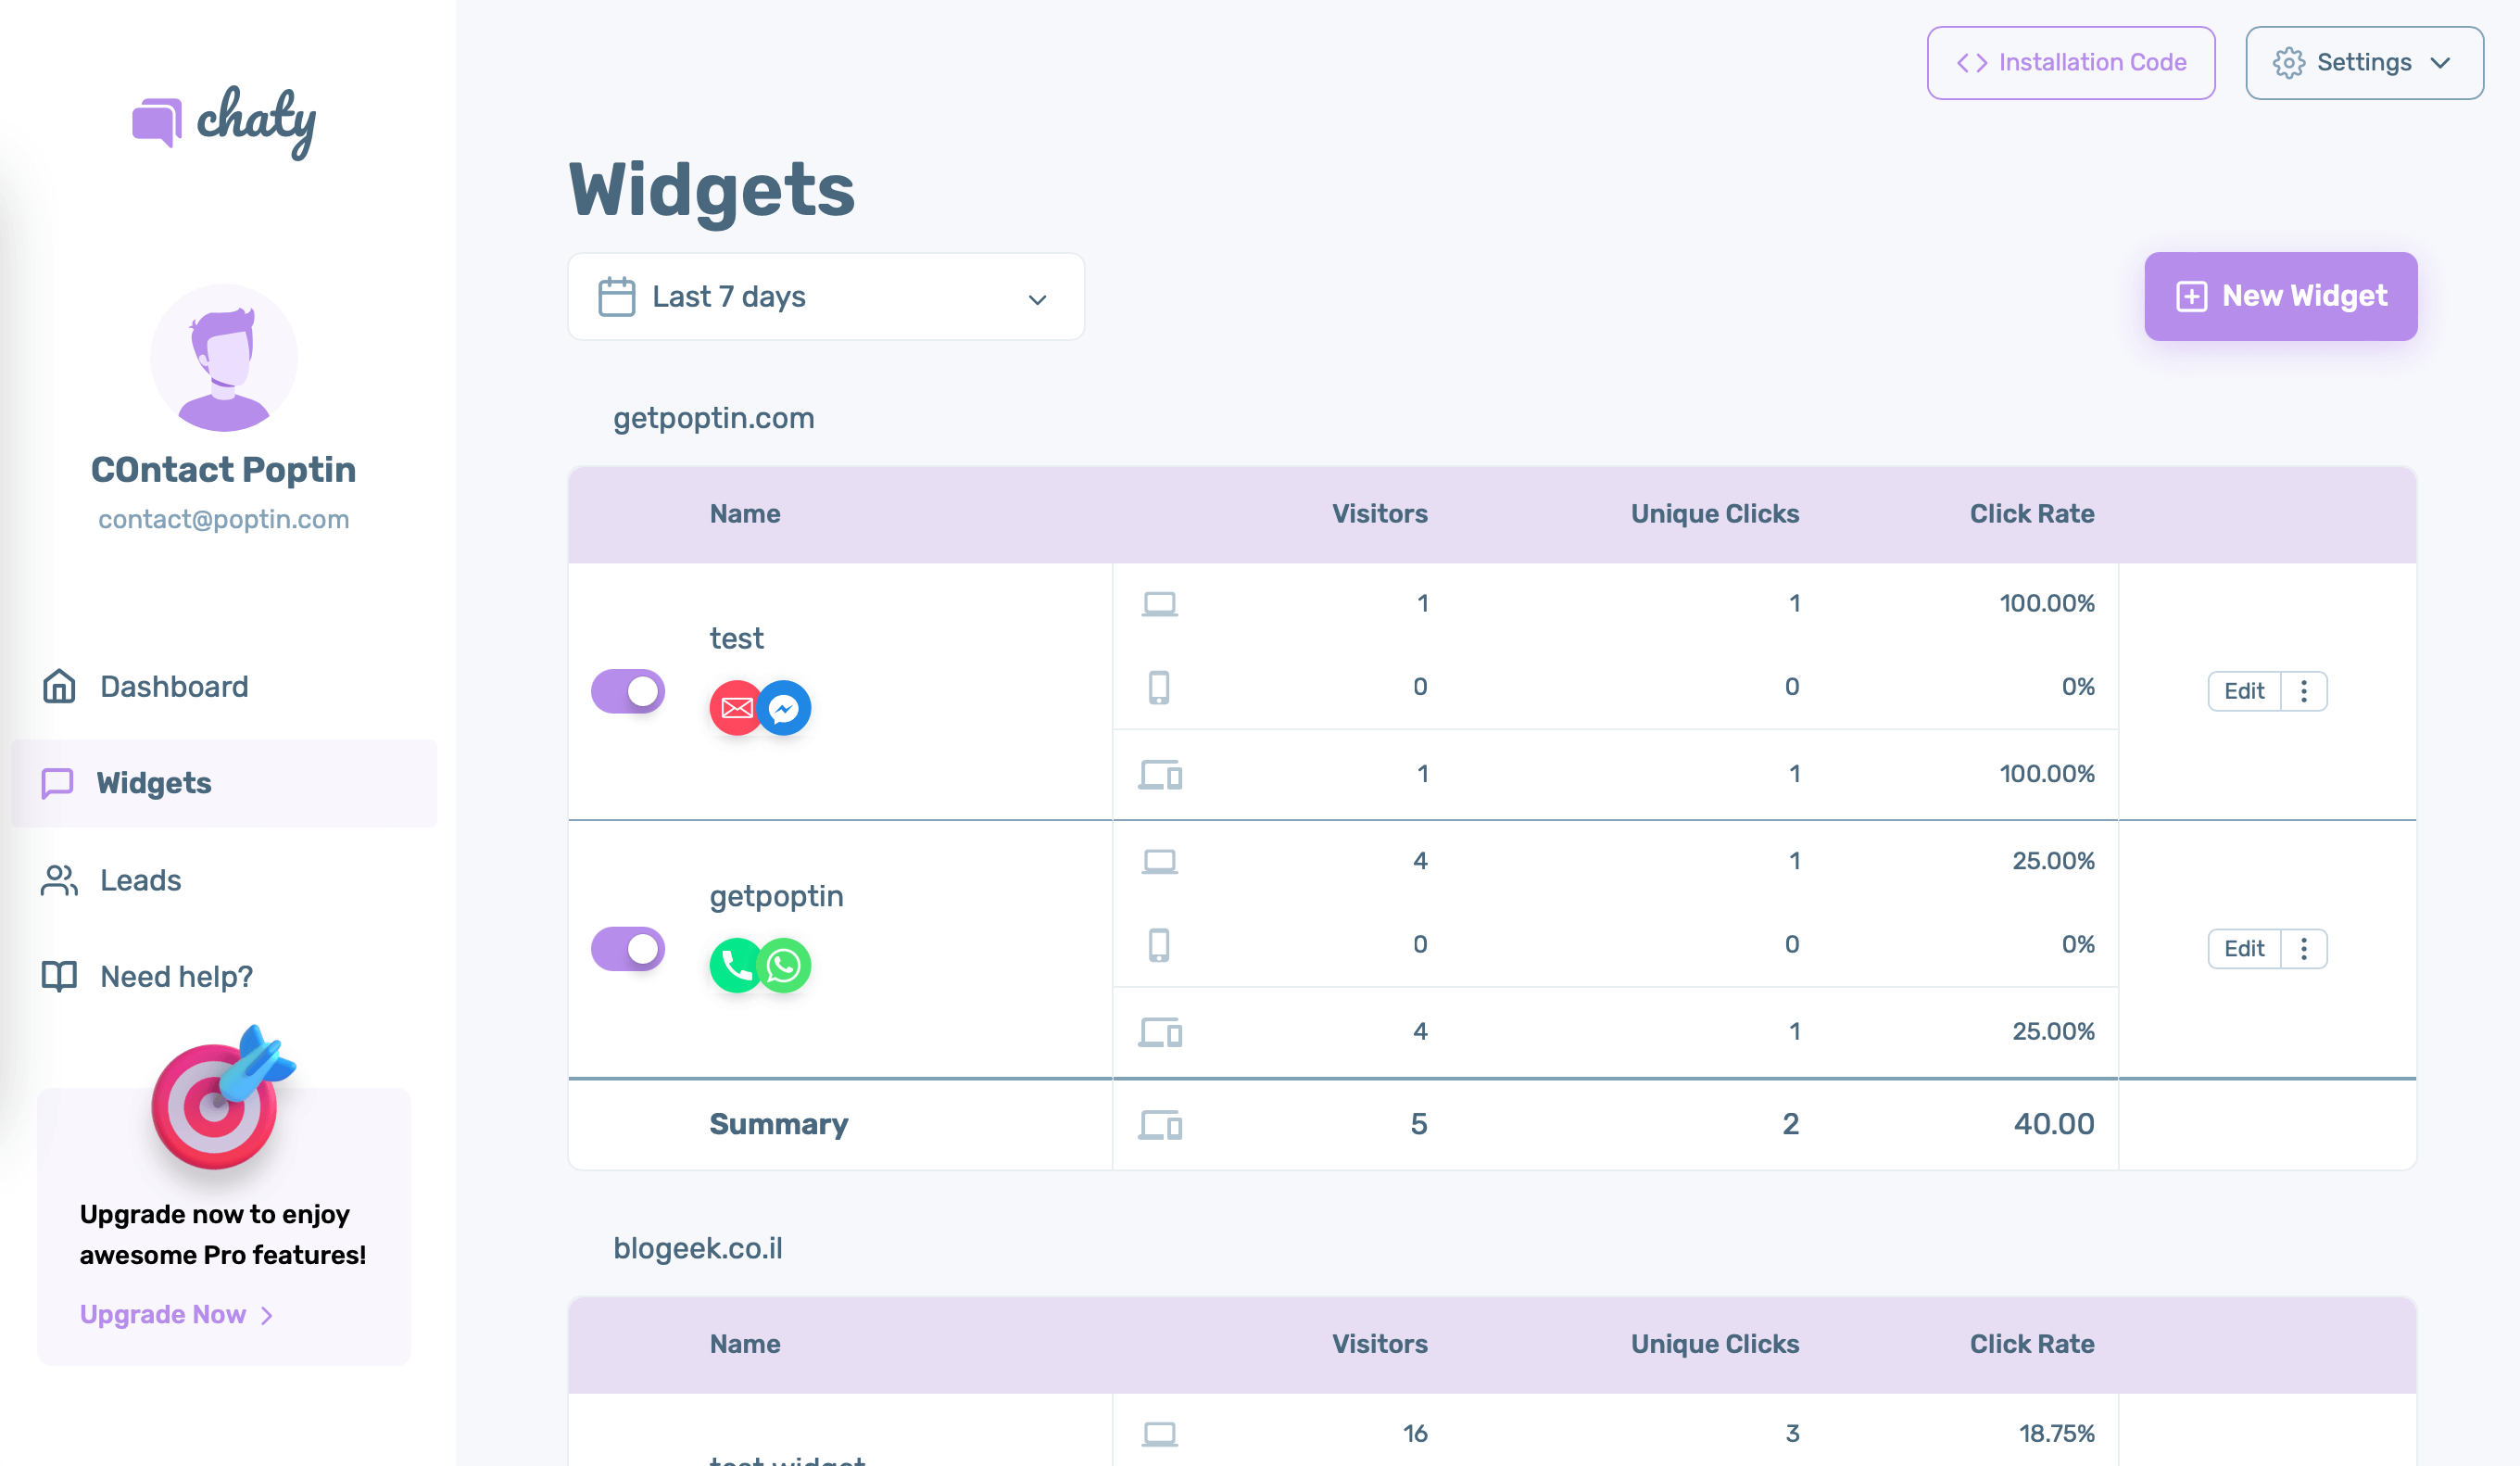
Step 2: From the first step – “Choose your channels” – click to add the email channel. It will appear below.

Step 3: Fill in your full email and select whether to show this channel on desktop or mobile, or both.
Step 4: Once ready, click on the “Settings” button to reveal additional settings for the channel, where the preset email subject is.
First you can add on hover text (the text that will show when somebody places their mouse on the channel)and set icon background colour or add a custom icon. If you upload a custom icon, please make sure you upload an image file of the following types: .png, .jpeg, .jpg, .gif or .svg and that it’s no bigger than 100 KB.
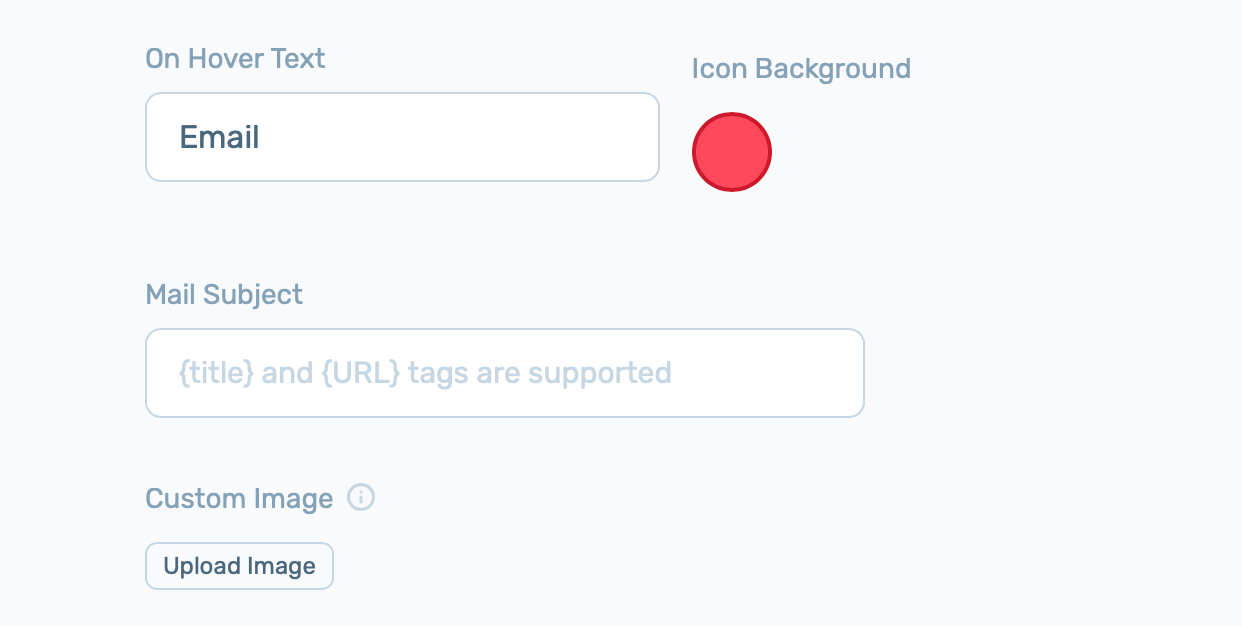
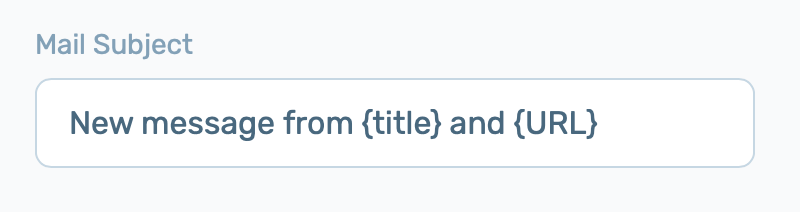
Step 5: Proceed to the Mail subject field and add your desired text. You can also add a title and URL tags to your pre-set message subject. The {title} tag grabs the name of the page the mail was submitted through and the {URL} tag grabs the page URL.
And that’s it! When you’re done customising the widget according to your needs and preferences, don’t forget to hit the ”Save changes” button.