In this guide we’ll show you how to install Chaty on a WordPress website.
Step 1: First, visit https://chaty.app and sign up for an account for free. If you already have one, log in instead and follow the next steps. If you haven’t created a widget yet, please start creating your first widget.
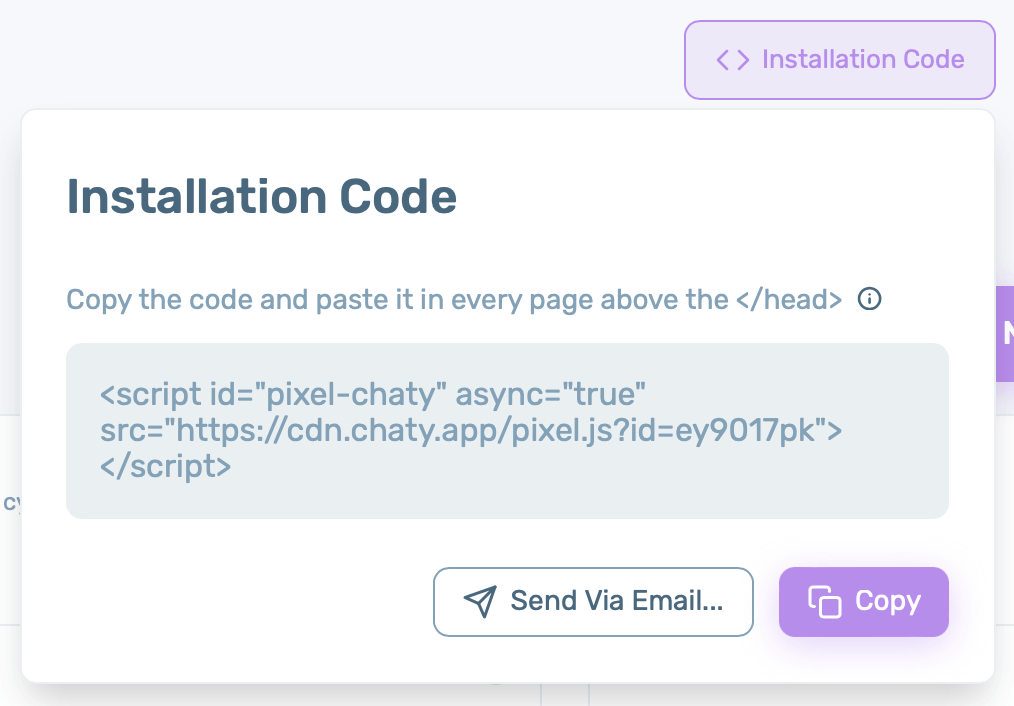
Step 2: Open the Chaty dashboard and click on the “Installation code” at the top right corner of the screen.

Step 3: A popup window with more detailed instructions and your installation code will appear. Please make sure you copy the Chaty installation code by clicking on the “Copy” button!
#Method 1: Use a plug-in to add custom script
The easiest way to add a JavaScript code to WordPress is with a third-party free plug-in. This method is easier to manage than adding the code directly to your theme and is ideal for less tech-savvy users.
For this tutorial, we’ll be using the free Insert Headers and Footers plug-in that you can download from the WordPress repository.
Once the plugin is activated, navigate to Settings → Insert Headers and Footers in your WordPress dashboard.
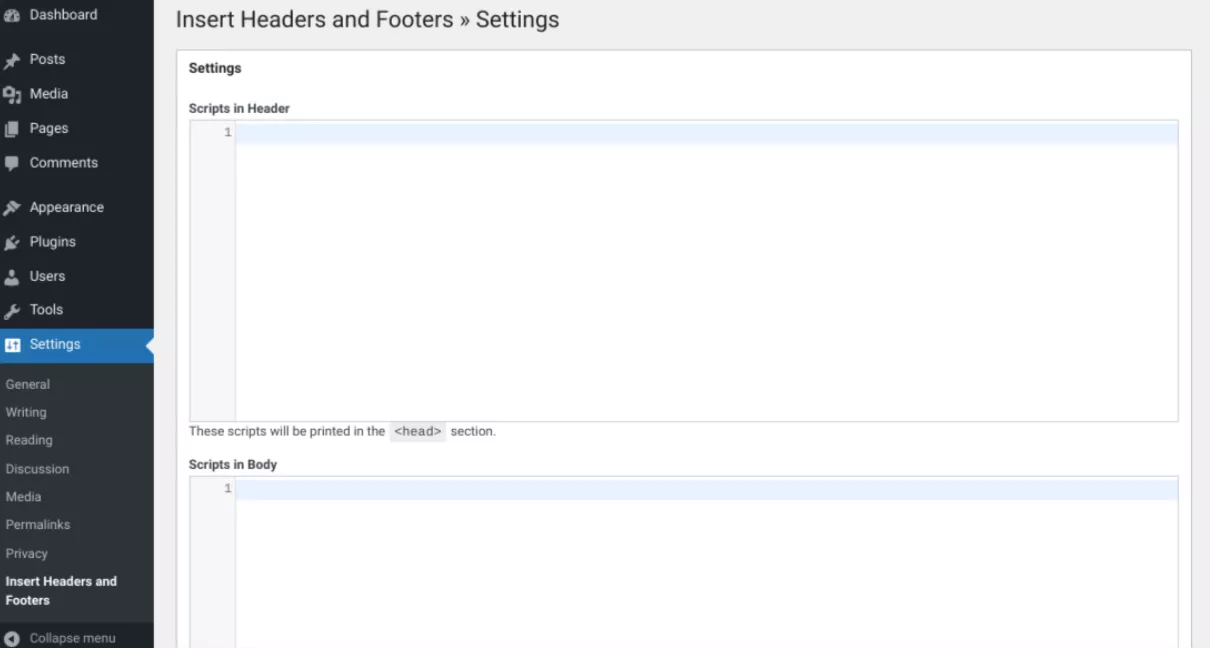
Now, you’ll see two boxes – Scripts in Header and Scripts in Footer. Any code you add to these boxes will be inserted into the header or footer of your site respectively. This is where you’ll add your Chaty installation code. In this case, you can add the code into the header section.
#Method 2: Manually add the installation code to WordPress Header
You will need to activate the Theme Editor in order to access your theme files and add the Chaty installation code. Please note that you need to make some minor changes to your wp-config.php file. Please follow the steps below:
- Log in to your hosting via SFTP or the Control Panel and go to your WordPress website
- Open the website folder – /path-to-your-wordpress-website/
- Open the wp-config.php file via Control Panel code editor or download it so you could edit it via your favorite text editor
- Add this code right before /* That’s all, stop editing! Happy blogging. */
define('DISALLOW_FILE_EDIT', false);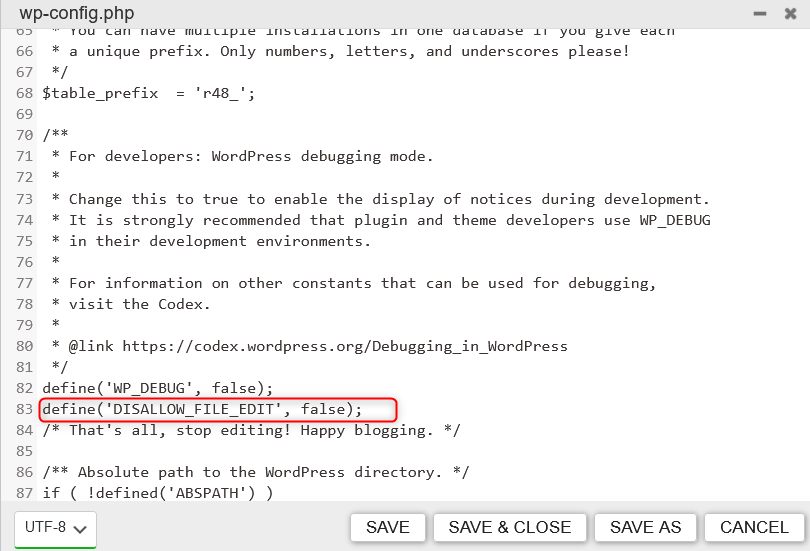
Make sure you save the changes. If you have downloaded the fine to make the changes, please make sure to upload it again.
Now, the Theme Editor is now available under Appearance > Theme File Editor.
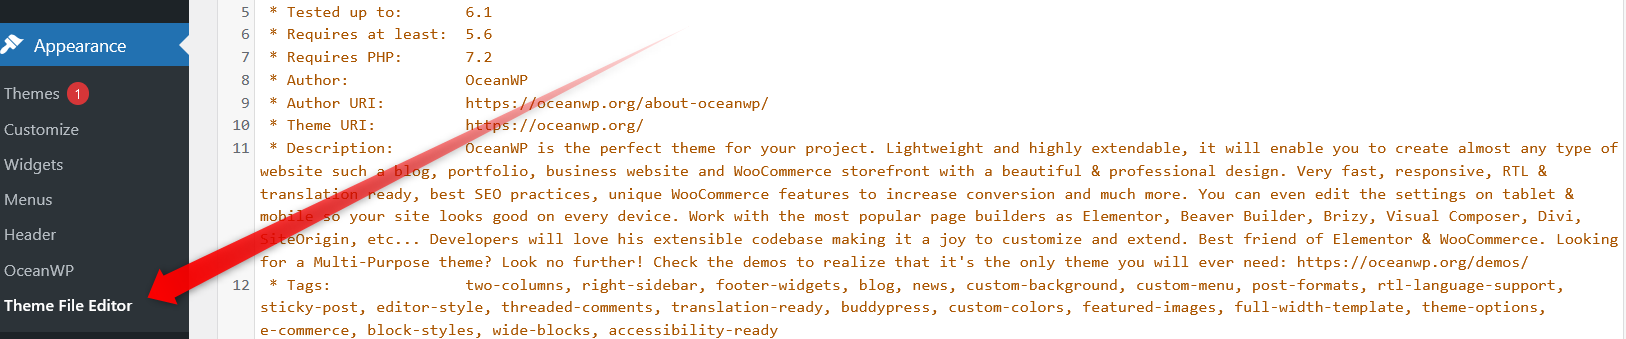
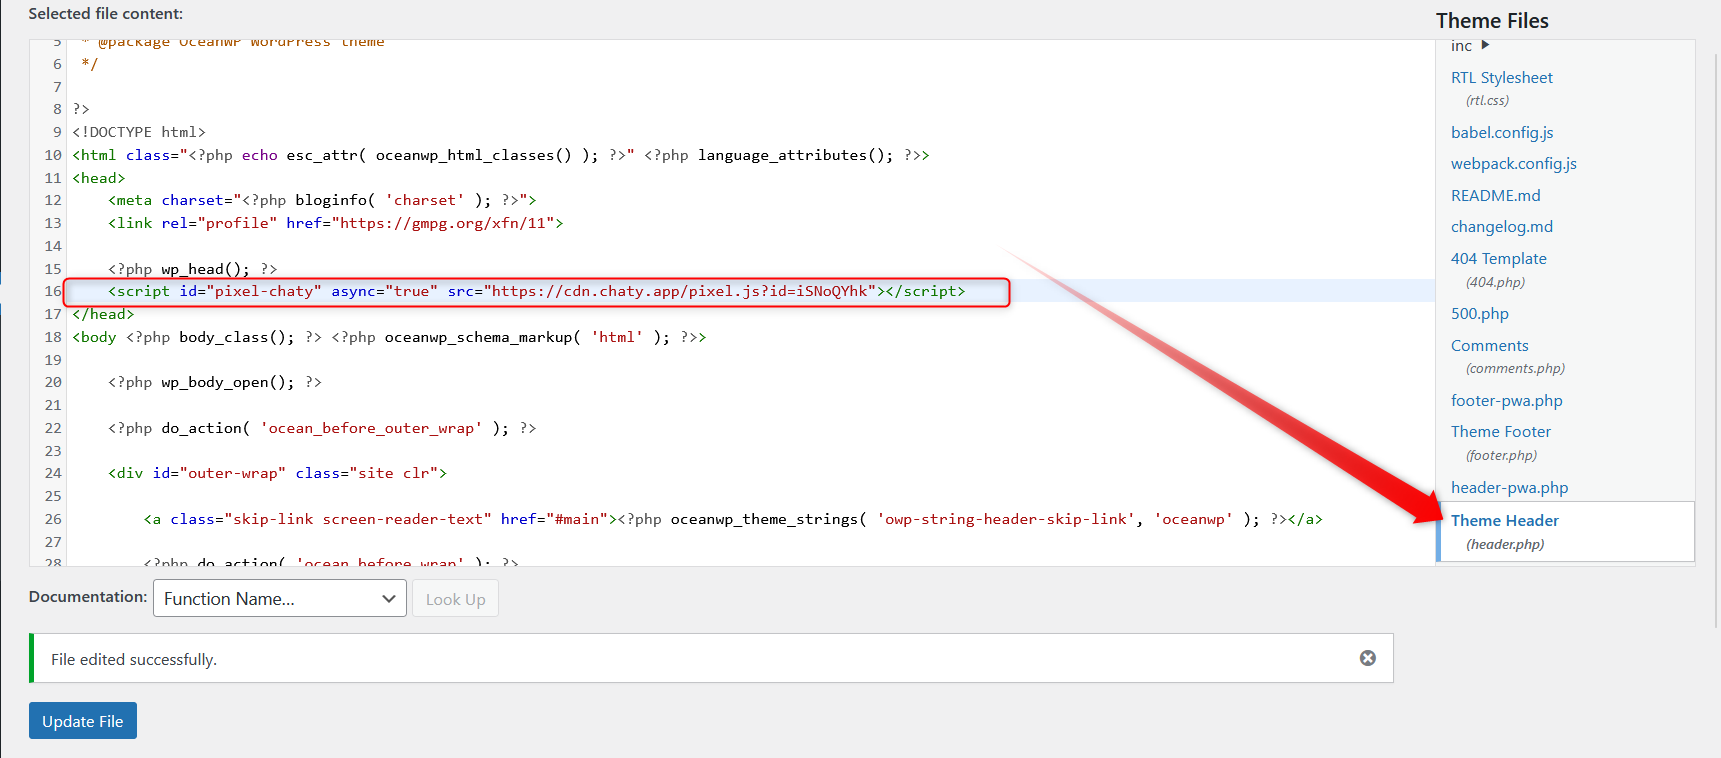
Then, from your theme files please search and find your Theme Header file(header.php)
In your Theme Header file simply paste the Chaty installation code at the bottom, right before the closing heading tag and click on Save.
You can also use our handy shortcuts – “Copy” to copy the Chaty code to easily paste it and “Send via email” to receive your installation code via email.
Once you add the installation code, the widget you create will appear on your website automatically and immediately.
In the end, based on your settings and customisations, it may look something like this.