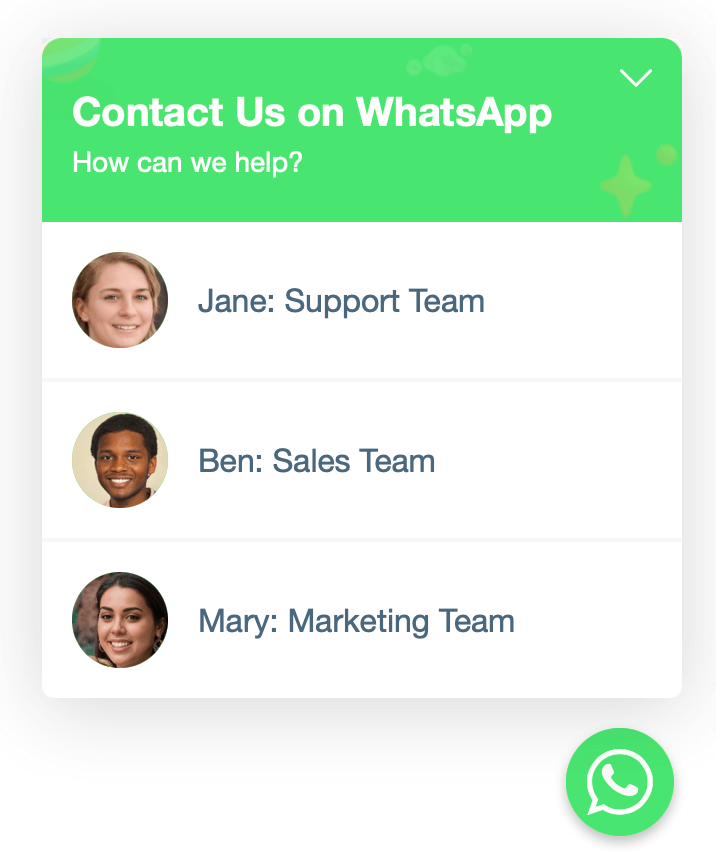
In this guide, we’ll show you how to set up Chaty with different agents or otherwise, we’ll show you how to add multiple instances of the same channel to your widget, for example, two WhatsApp numbers of two different agents to contact.
You can add multiple agents to each channel in Chaty, apart from the Custom Links and the Contact Form, however, for the purposes of this guide we’ll use WhatsApp as an example. Also, please note that this feature is available in our Paid plans only!
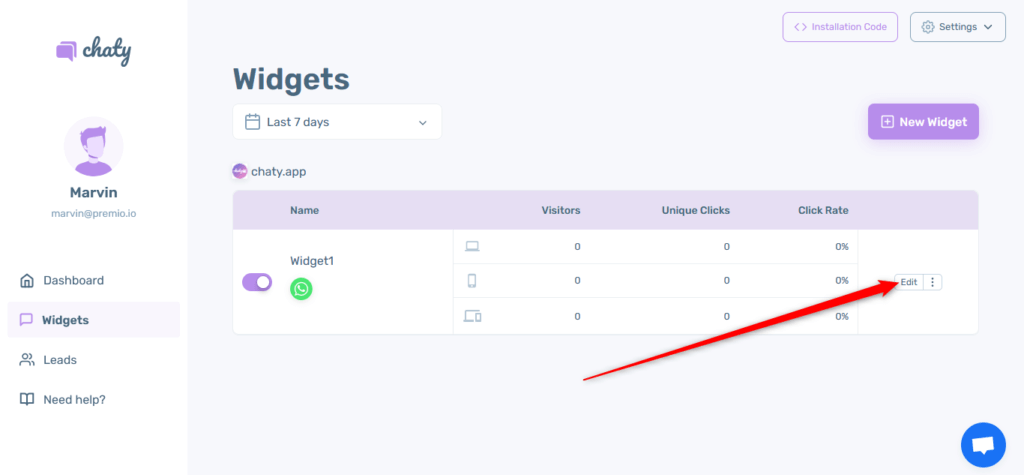
Step 1: Start by opening your Chaty dashboard and click on Widgets. Click on edit next to the widget you wish to edit.
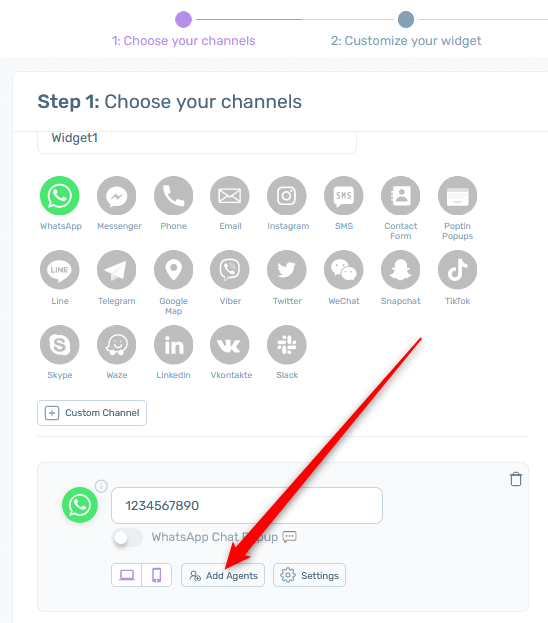
Step 2: Add the channel you’d like to add agents to, for example, WhatsApp. The regular channel settings will appear. To set up agents, click on the “Add agents” button.
Step 3: A new screen “Agent Launcher” will appear. Click on the “Customize” button to reveal more settings. Use these settings to customise your initial WhatsApp channel button with an icon, text, header and sub-header and colours of your choice.
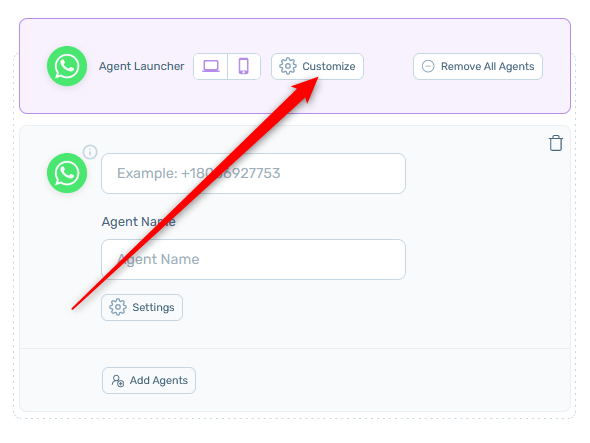
Step 4: Click “Add Agents” to add another WhatsApp number and click “Settings” under Agent Name for the option to upload your custom image for that agent and set its icon background color.
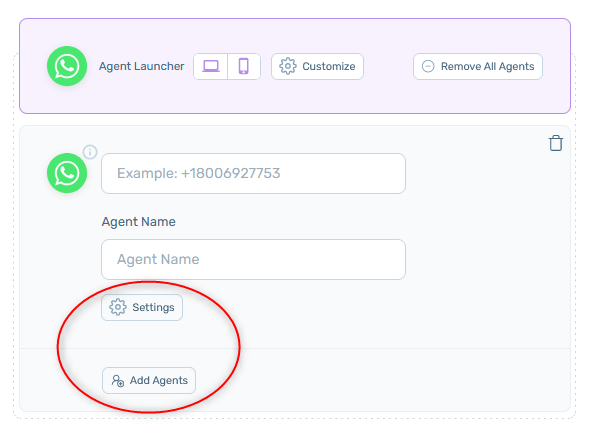
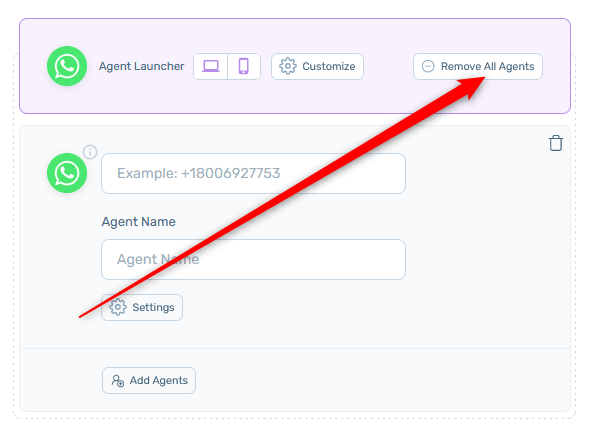
Step 5: If you want to remove the multiple agents functionality and use the regular WhatsApp channel again, simply click on the “Remove All Agents” button.
Step 6: That’s it! You can proceed with further setting up and customising your Chaty widget. In the end, depending on your settings, the multiple agents functionality may look like this. Clicking on each of the agents will open a new WhatsApp chat with the respective agent.
