In this guide we’ll show you how to install Chaty on a PrestaShop website.
Are you new to the Chaty app? Keep reading below to find out how Chaty works and how it can be useful for you.
Chaty offers your website visitors an easy click-to-chat connection to various platforms that you’re available on within a single widget. Having a single widget with different channels is helpful in improving your customer service and increasing your possibilities for conversions and sales.
You can use the Chaty app with more than 20 common channels such as phone, email, WhatsApp, Facebook Messenger, Instagram, Telegram, Twitter, TikTok, Slack, Skype, Vkontakt, Viber, SMS, LinkedIn, Google Maps, Line, WeChat, Snapchat, Waze, Poptin, a contact form or you can even add custom channels. Let’s get started!
Step 1: First you will need to install the Chaty app module from the PrestaShop marketplace completely for free.
If you need any guidance on this, please follow these instructions on how to add an app on your PrestaShop website.
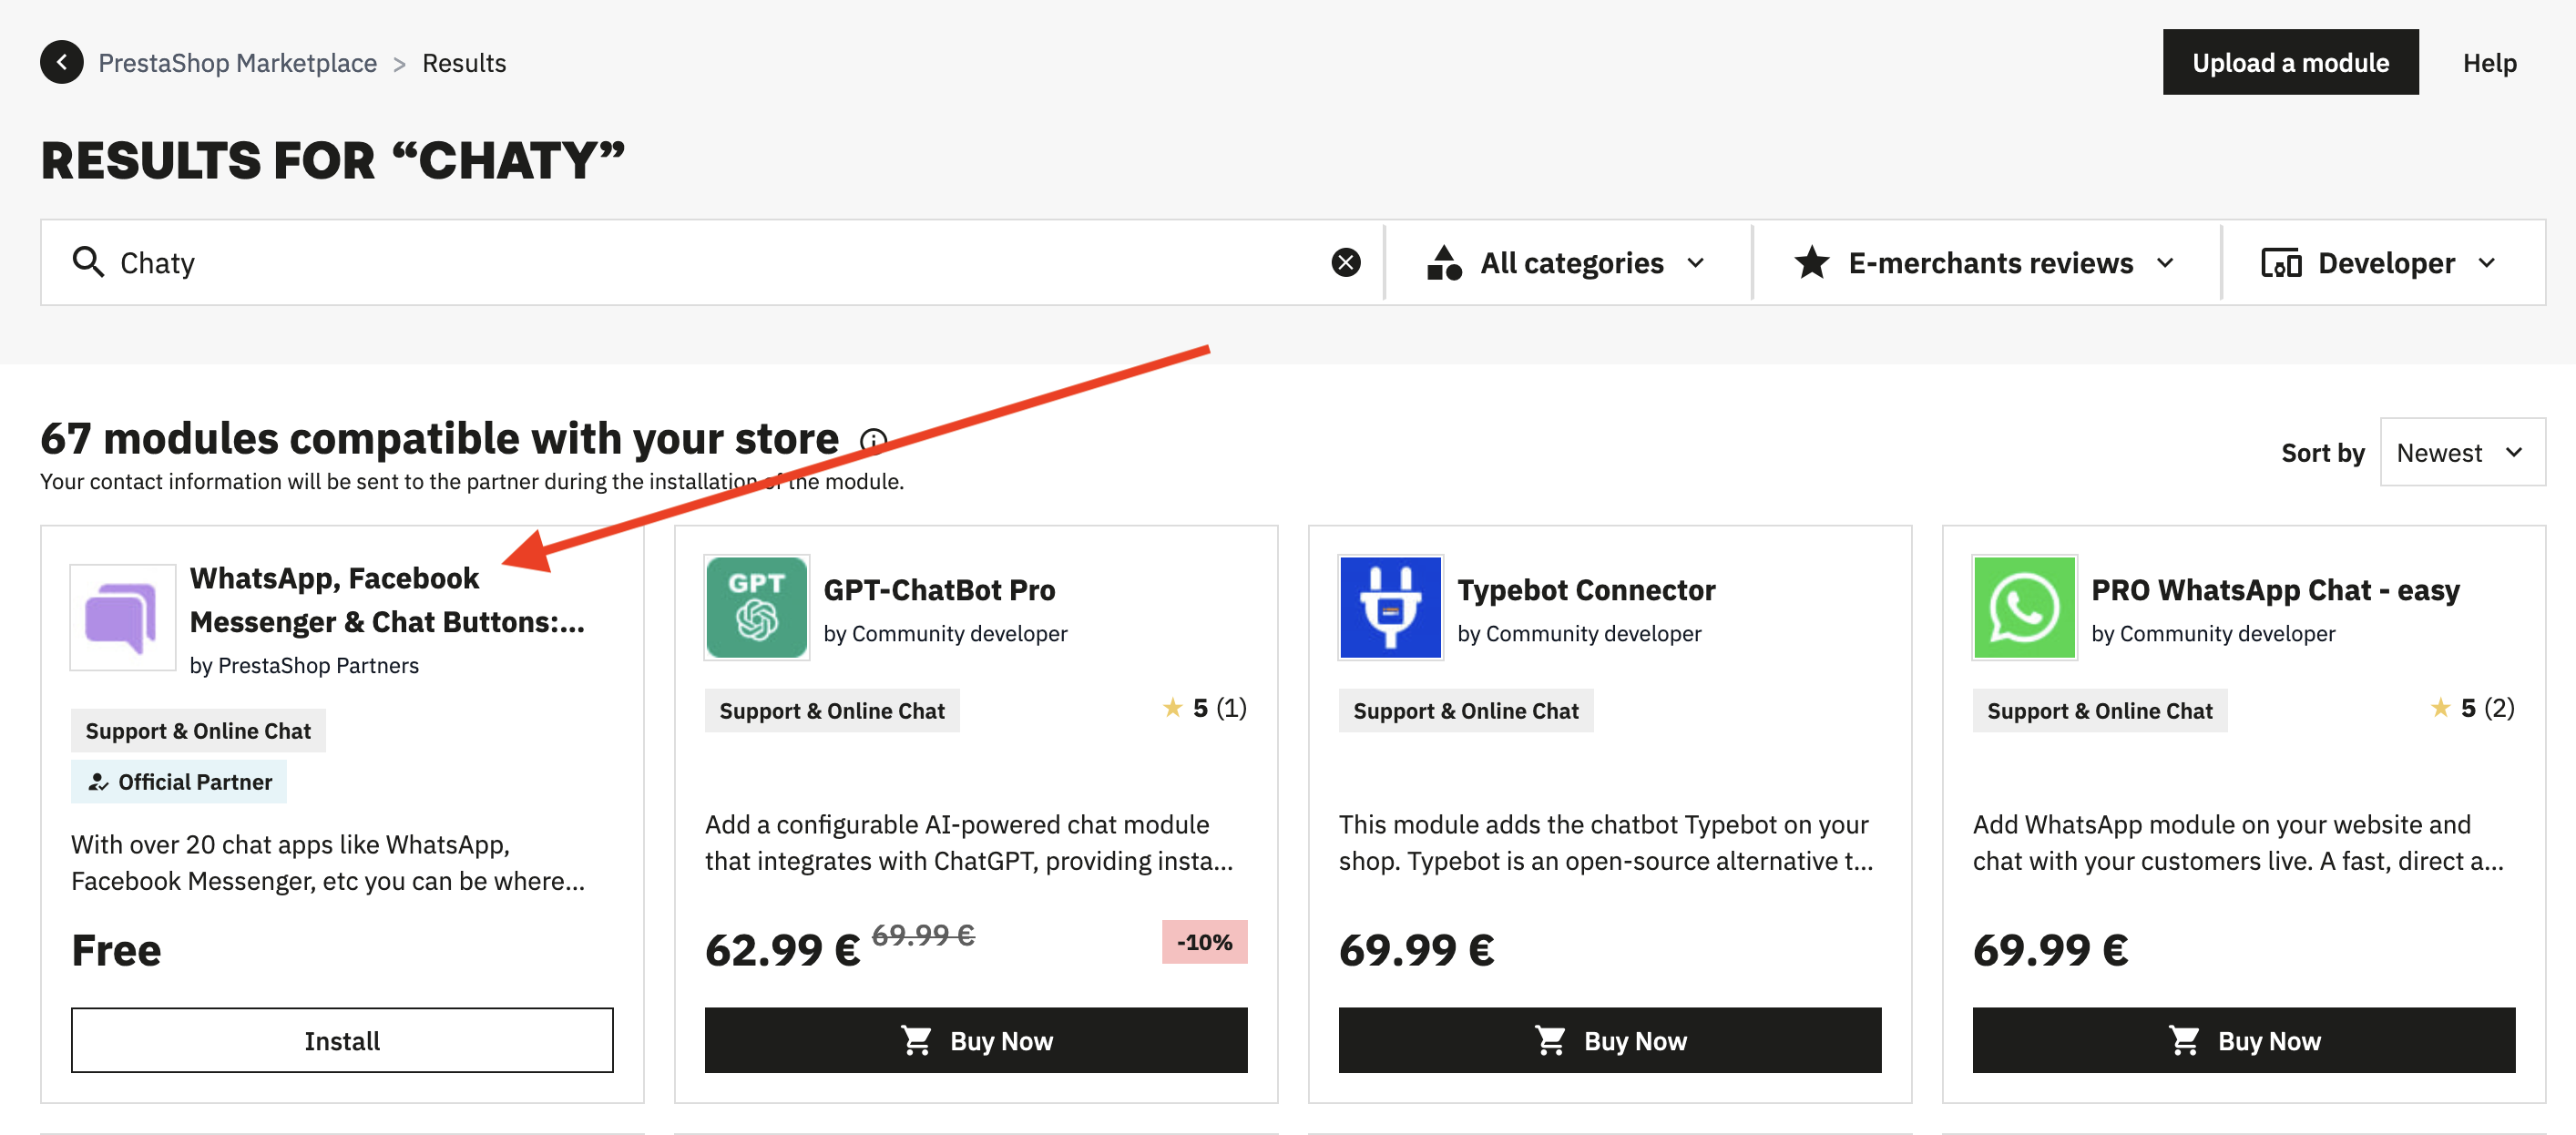
Step 2: Next, go to the PrestaShop marketplace and search for “WhatsApp, Facebook Messenger & Chat Buttons: Chaty” – this is the full name of the app!
Step 3: Now click on the title “WhatsApp, Facebook Messenger & Chat Buttons: Chaty” and the Chaty module popup will appear.
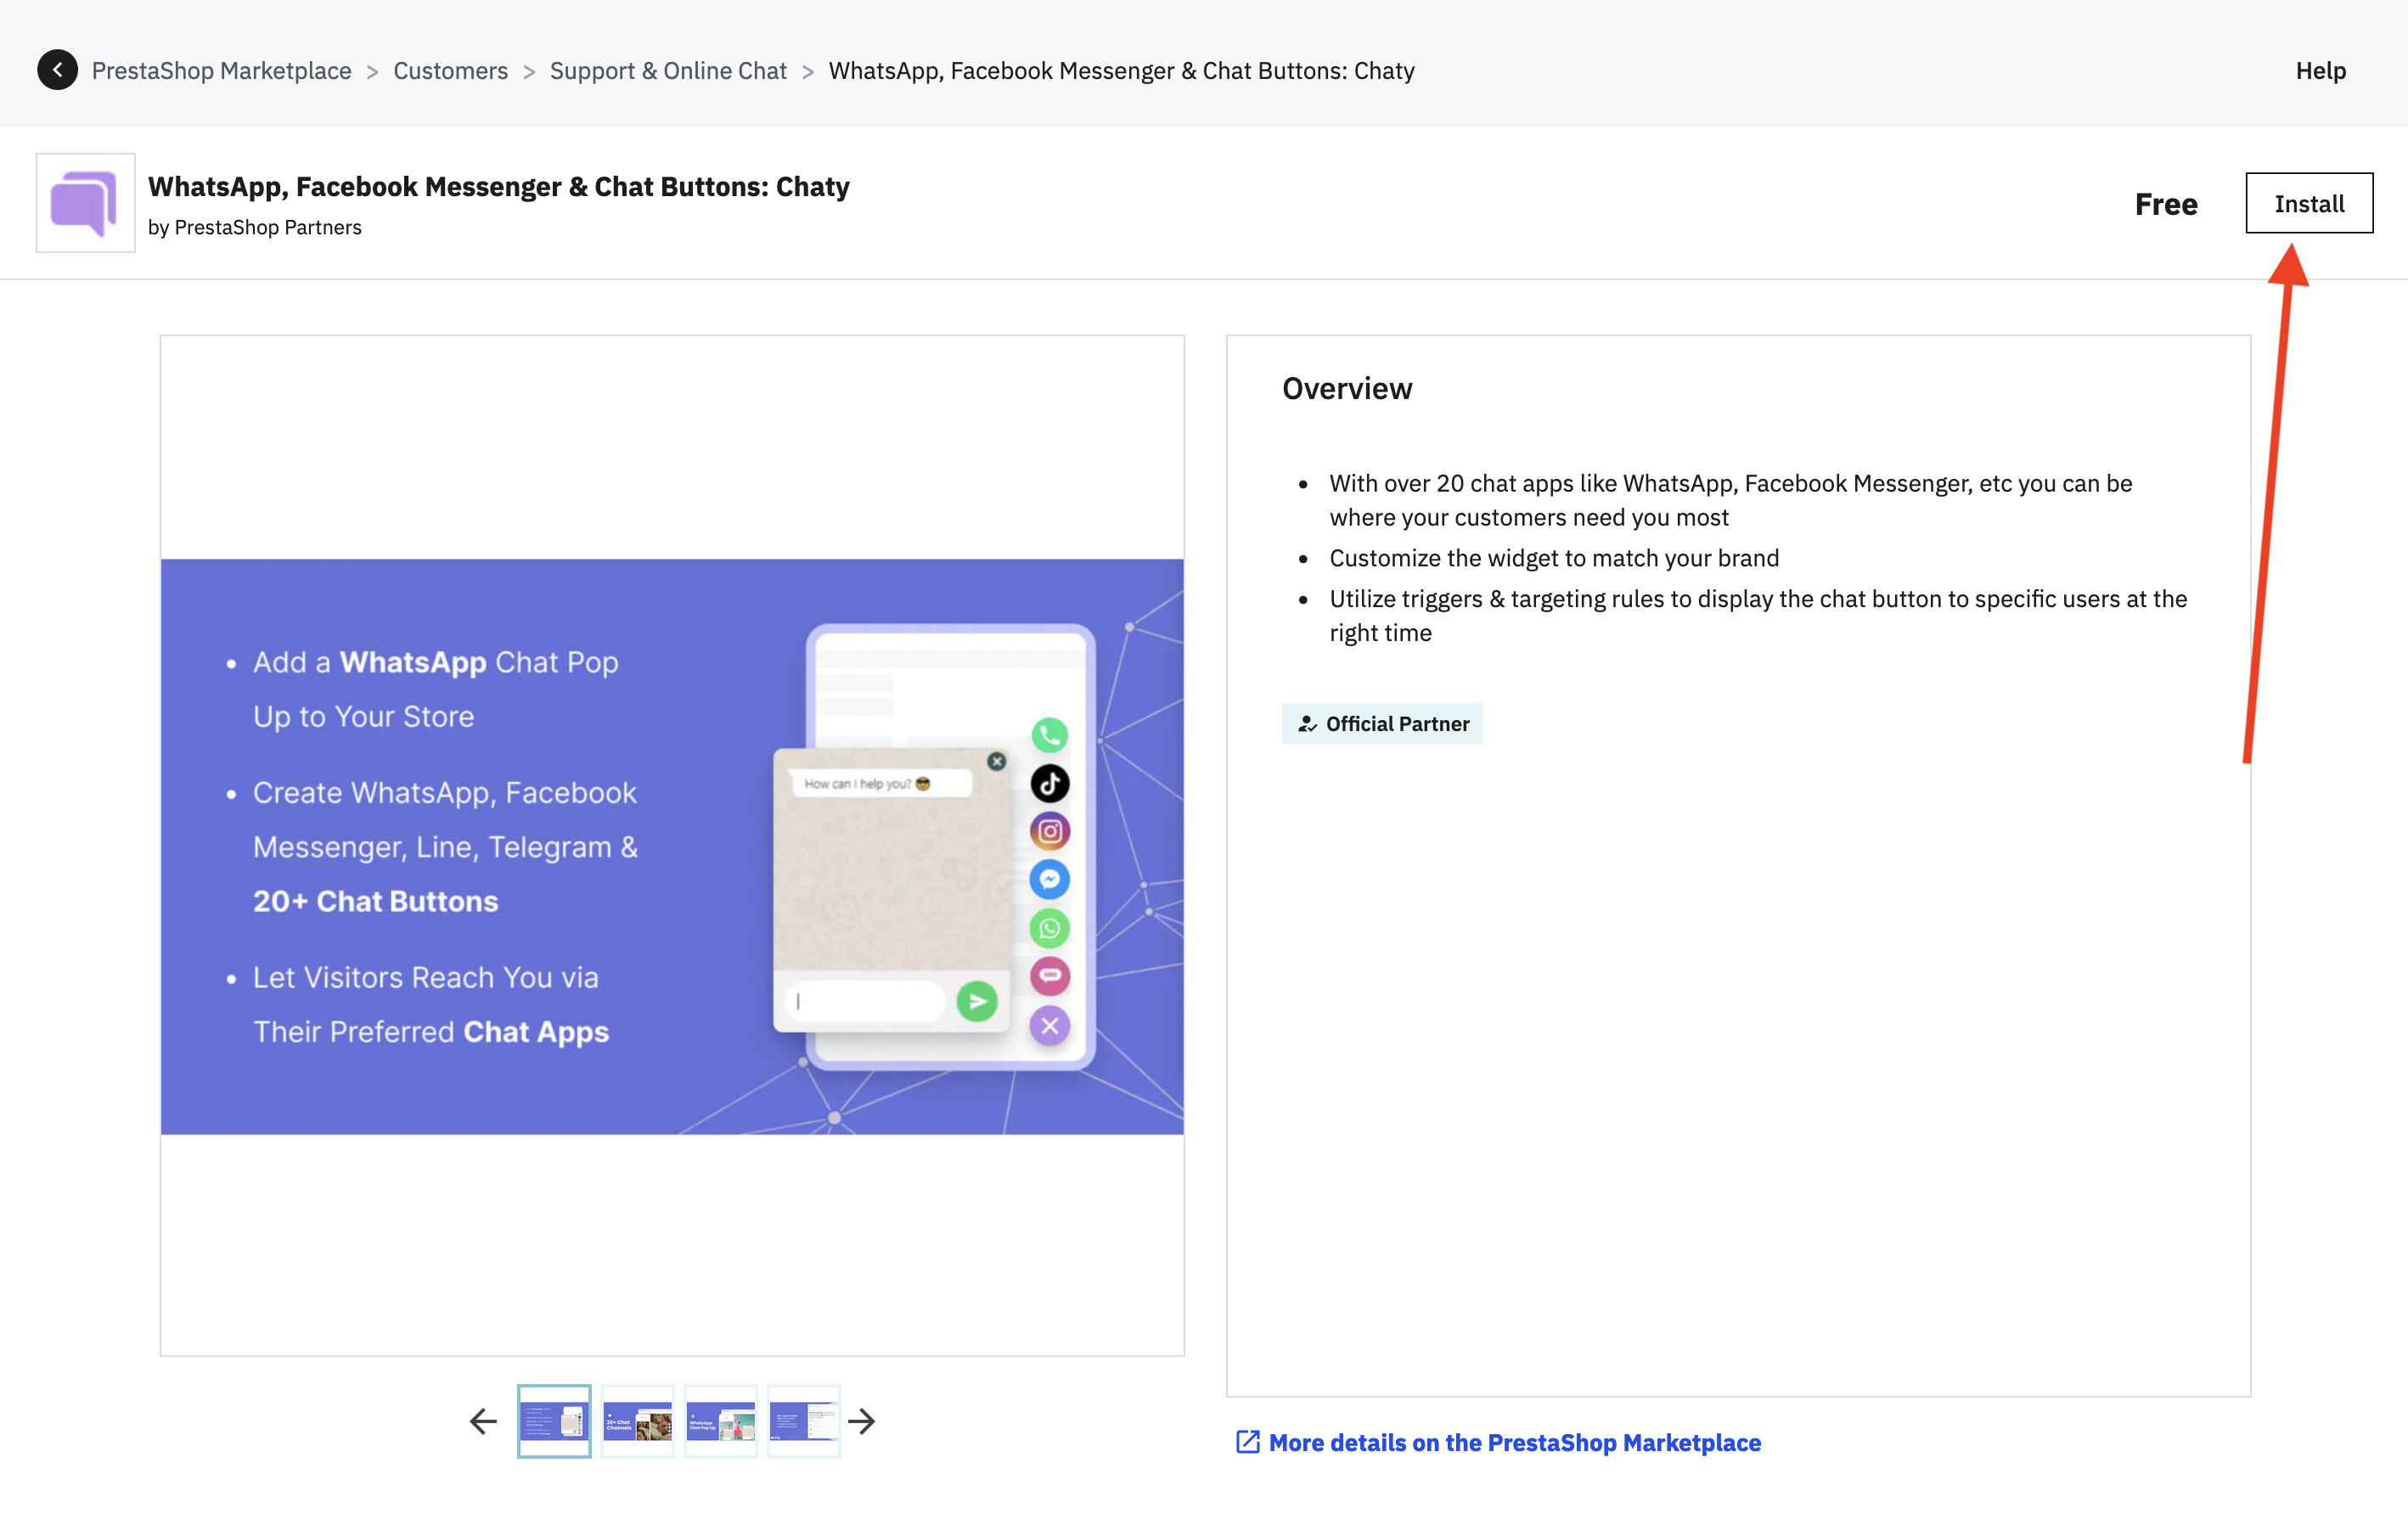
Step 4: Then, click on the “Install” button to install the Chaty module:
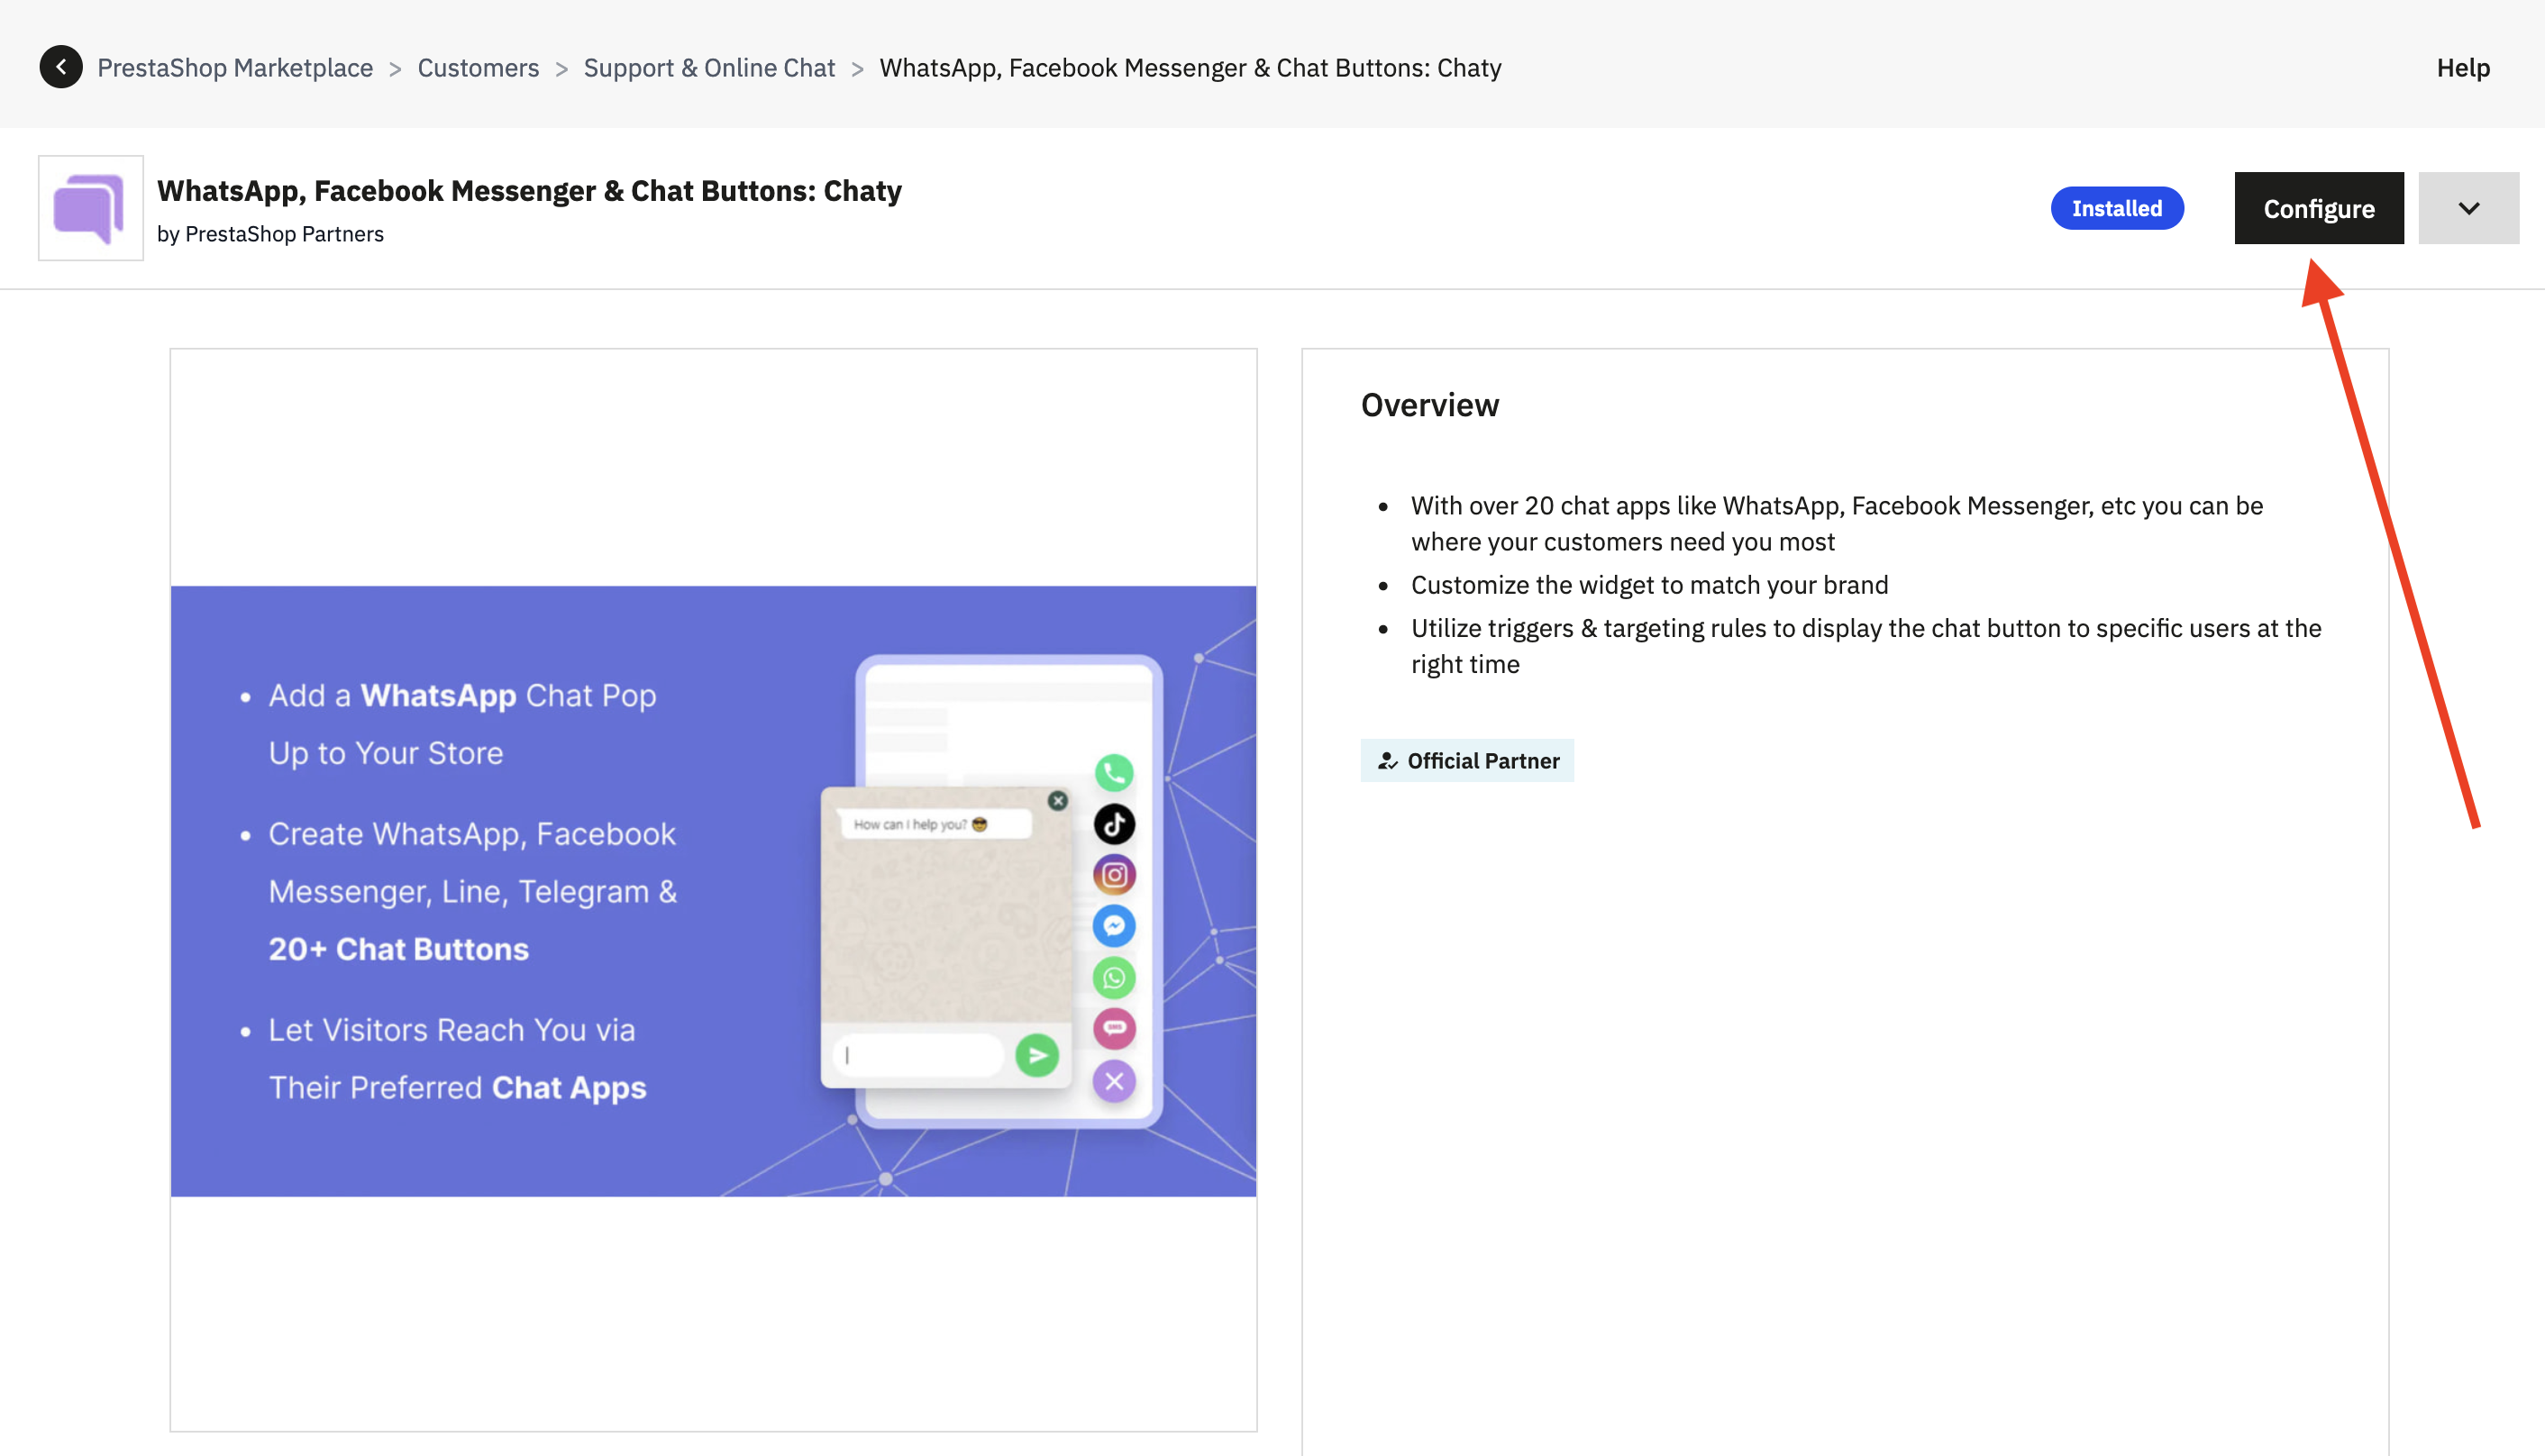
Step 5: Now, you will see a confirmation that the Chaty app is installed. To open the app settings and start configuring your first Chaty widget, click on the ”Configure” button:
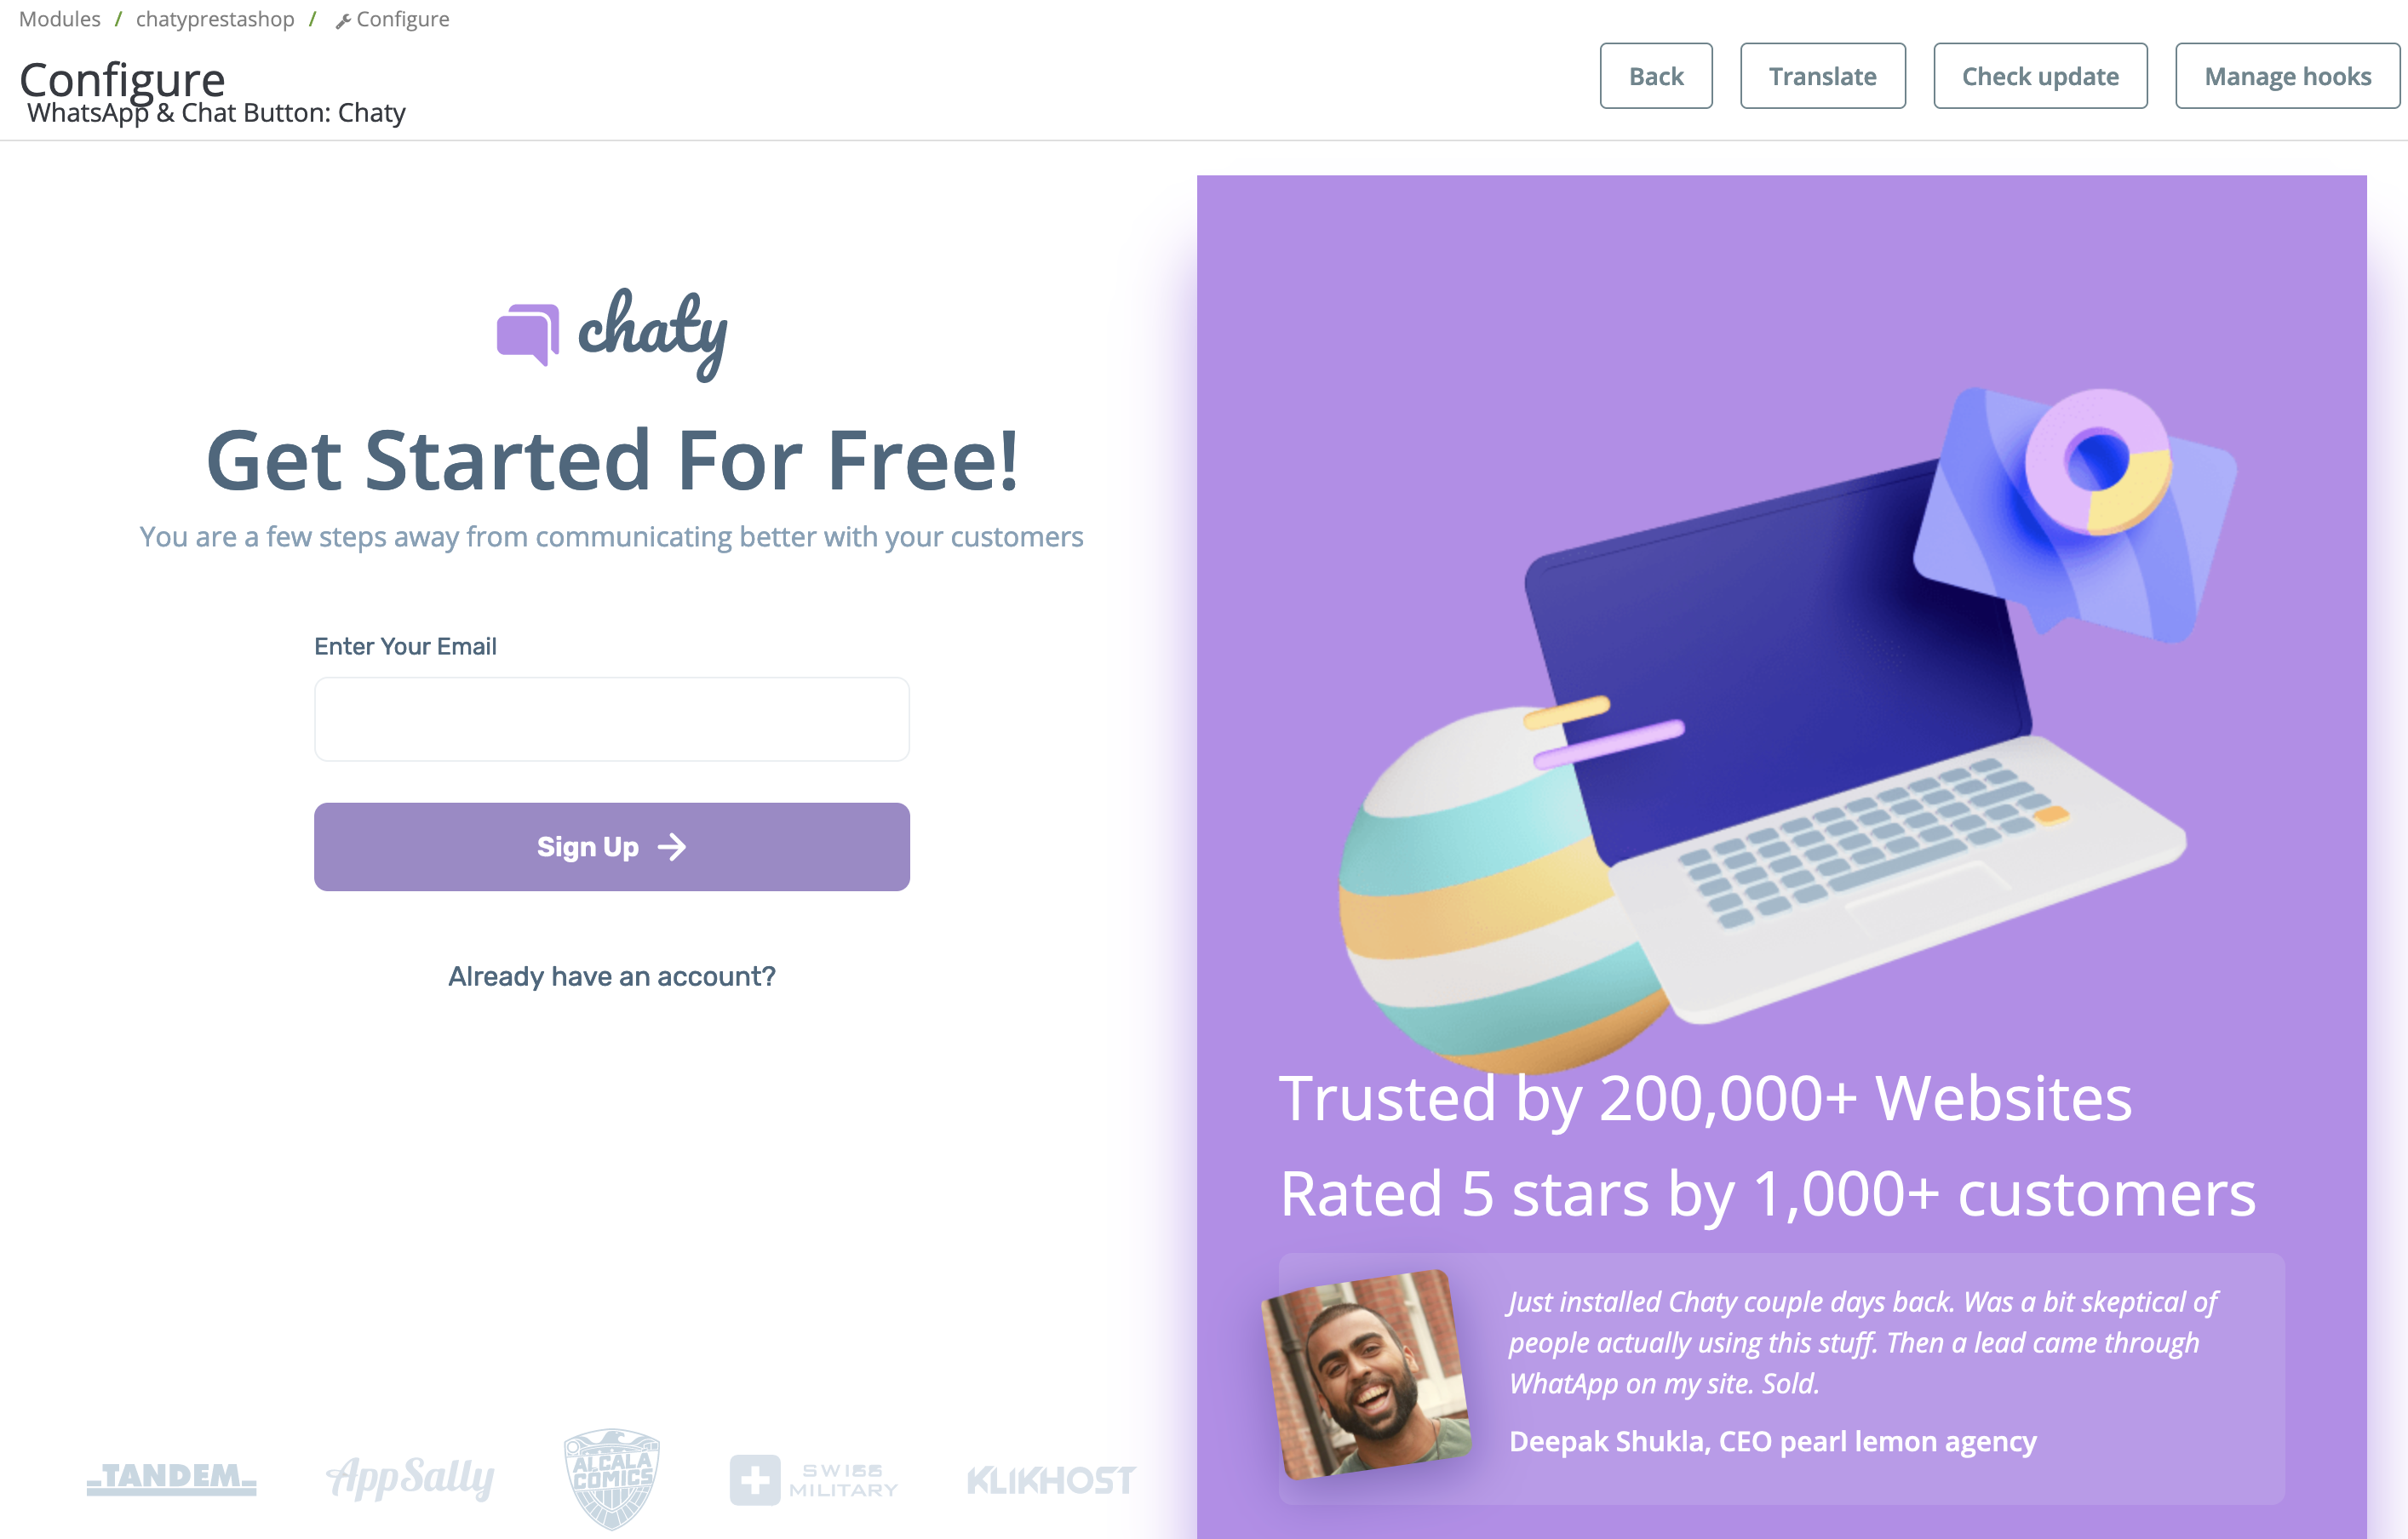
Step 6: Next on, you will need to create a free Chaty account – or log in, if you have one already – and you are ready to use the Chaty app on your PrestaShop website!
Step 7: You need to click on the “Choose Plan” button.
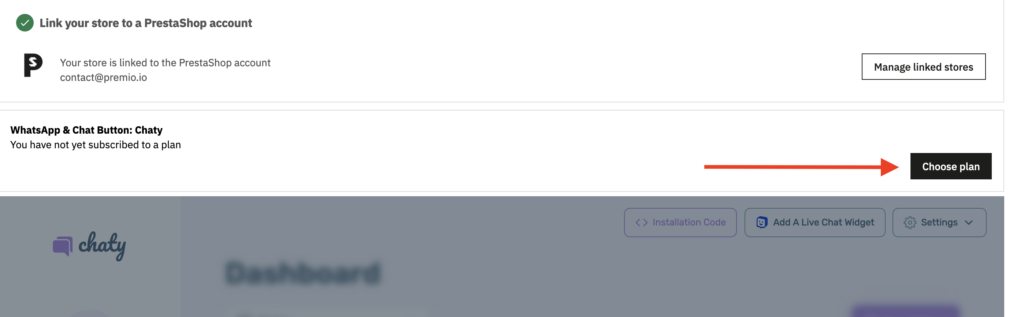
Step 8: Then, you need to select a plan through PrestaShop – it can be the free plan or any of the free plans. Please note that the billing will be handled through PrestaShop.
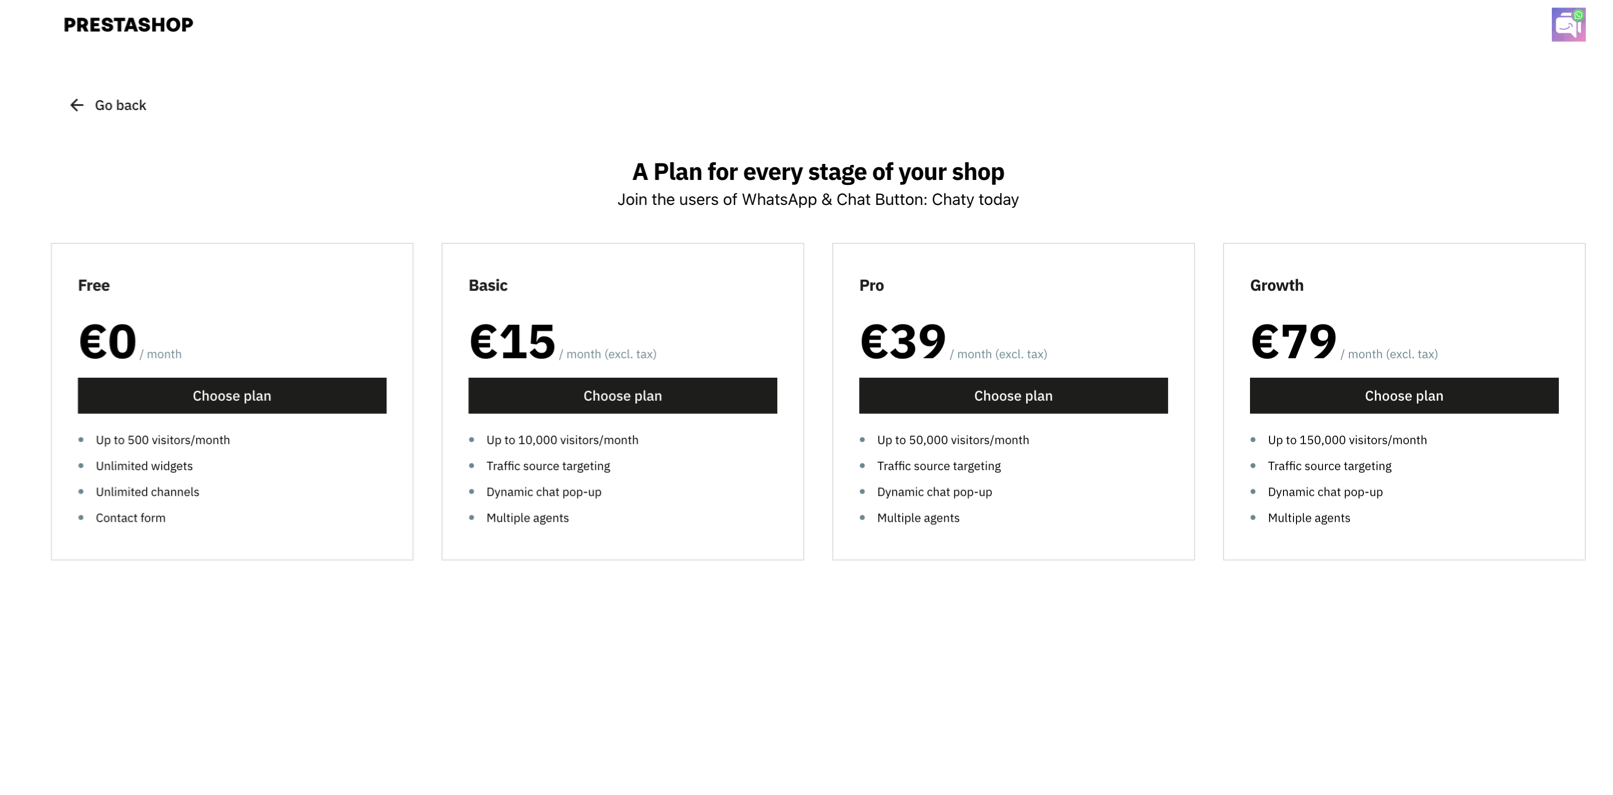
Step 9: Finally, create your first Chaty widget! You may want to check our easy visual guide on how to use Chaty here. When you’re done, click on the Save button. And that’s it – no need to manually install any code whatsoever. The Chaty widget you create will appear on your PrestaShop website automatically, immediately!
In the end, depending on your settings and customizations, it may look something like this:
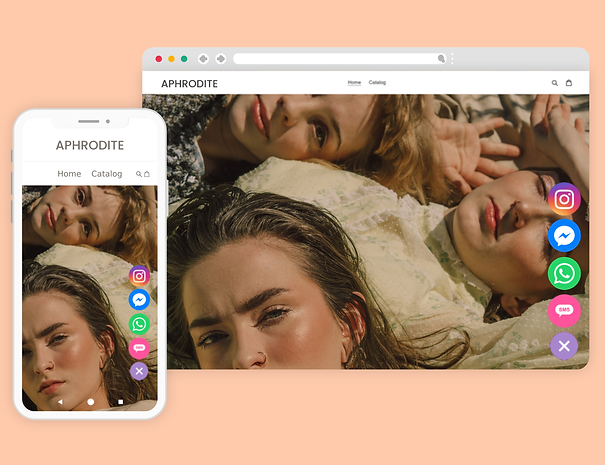
Don’t forget to check our entire Chaty knowledge base to make the most out of the product.
If you any assistance with configuring this, please don’t hesitate to reach out to our support team!