Ever hesitate before buying online because you have questions? Or maybe you run a business and want to give customers instant help? You’re not alone. Real-time chat support makes a big difference.
That’s where Chaty comes in. It’s a chat app that lets you provide quick and easy support.
Chaty is a user-friendly chat app for Wix websites that allows you to add multiple chat channels to your website. This means you can connect with visitors on their preferred platforms, like WhatsApp, Facebook Messenger, Telegram, and even SMS all from a single chat widget. Chaty can significantly boost your Wix site’s engagement and lead to happier customers just by offering customers a convenient way to chat directly with you.
What Are The Benefits of Adding Chaty to Your Wix Website?
Here’s how Chaty can help you enhance your Wix website’s functionality:
- Boost Conversions and Sales: Chaty allows you to engage with visitors directly as they browse your site. This lets you answer questions, address concerns, and provide personalized recommendations that can nudge them towards a purchase or booking. Visitors who chat with a representative are more likely to convert, leading to increased sales and revenue.
- Improve Customer Service: Chaty offers a convenient and efficient way to provide real-time customer support. Visitors can get their questions answered quickly, reducing frustration and improving their overall experience. This can lead to higher customer satisfaction and loyalty.
- Gather Valuable Insights: Chaty can provide you with valuable data about your visitors and their interactions. You can see what questions they’re asking, what pages they’re visiting, and where they might be encountering difficulties. This information can help you improve your website, content, and marketing strategies.
- Personalize the Experience: Chaty allows you to customize the chat window to match your brand identity and website design. You can also set automated greetings and offline messages to provide a professional and welcoming experience for visitors.
Now that you know the benefits, let’s show you a step-by-step guide on how to add a chat app to your Wix website with Chaty.
Before we start…
Before we dive into adding Chaty to your Wix site, let’s make sure you have everything you need:
- A Wix website: If you haven’t already, creating a Wix website is easy and free. Wix offers a user-friendly platform to build and design your website.
- A Chaty account: The good news is that Chaty offers a free plan. You can create an account directly through the Wix App Market during the installation process.
Adding Chaty to Your Wix Site: Step-by-Step
Here’s a detailed guide to walk you through the process.
Step #1 – Head to your Wix Editor
Sign in to your Wix account and navigate to your dashboard.

Step #2 – Open the Wix App Market
Once you’re in, it’s time to find the Chaty app. Look for the “Apps” button on the left-hand side of the Wix editor. This button will open the Wix App Market, which has a treasure trove of helpful tools and features to enhance your website.
Step #3 – Search and Add Chaty
In the Wix App Market search bar, type in “Chaty: WhatsApp & Chat Buttons“. Once you find it, click “Add to site” to install Chaty on your Wix site.
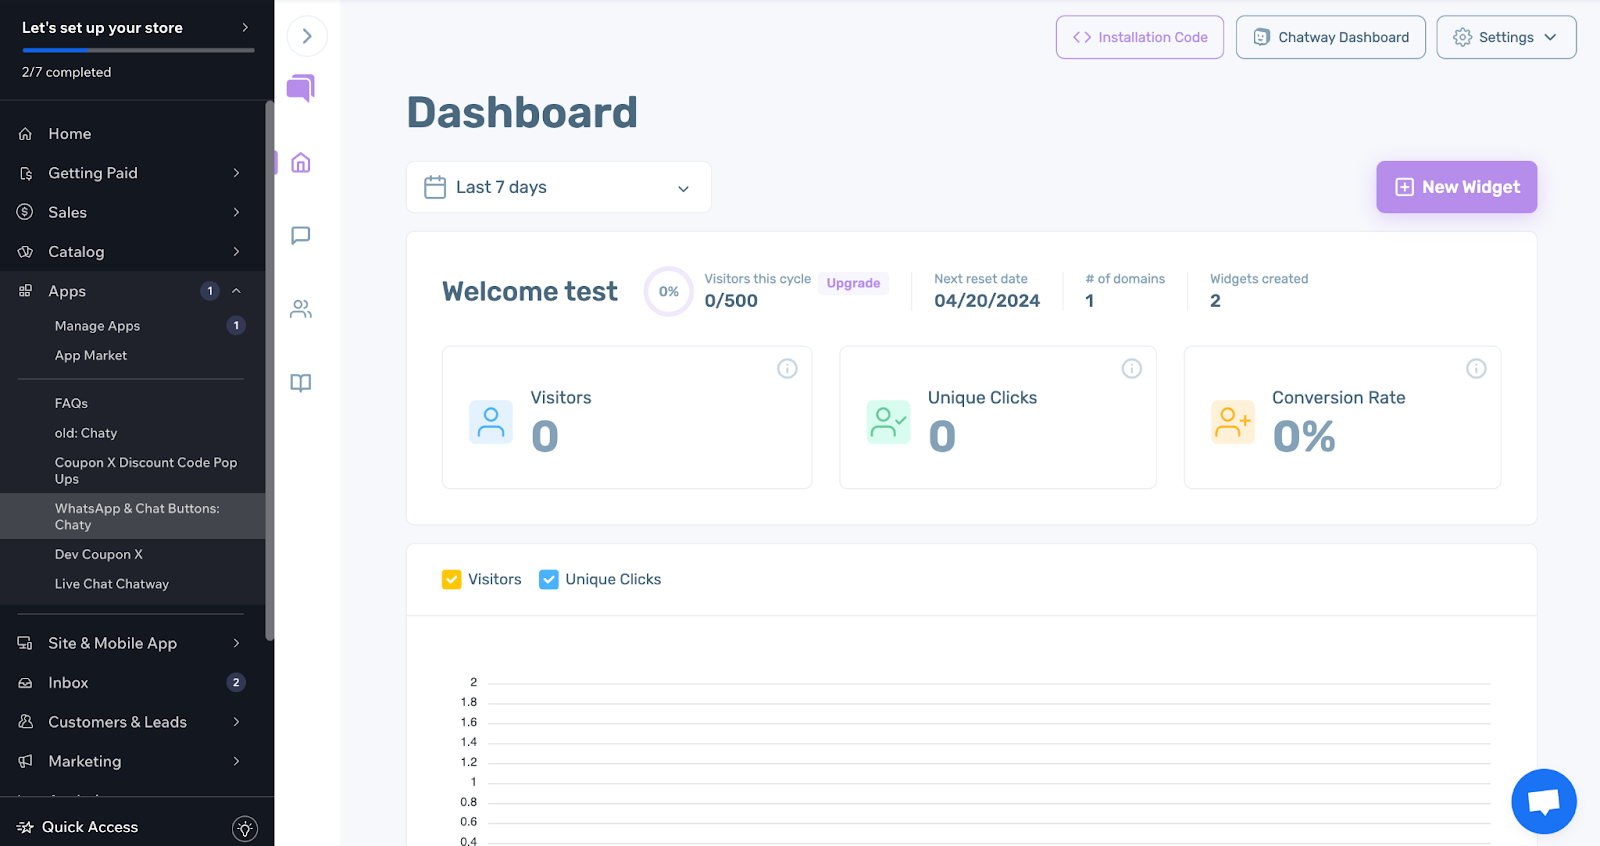
Step #4 – Configure Chaty Settings
After installing Chaty, you’ll see it listed in your “Manage Apps” section. Click “Open” to access Chaty’s settings panel. This is where you’ll personalize your chat experience. You’ll likely need to enter your Chaty account details (if you haven’t already created one) to connect it to your website.
Step #5 – Designing Your Chat Widget
Firstly, Select your Chat channels
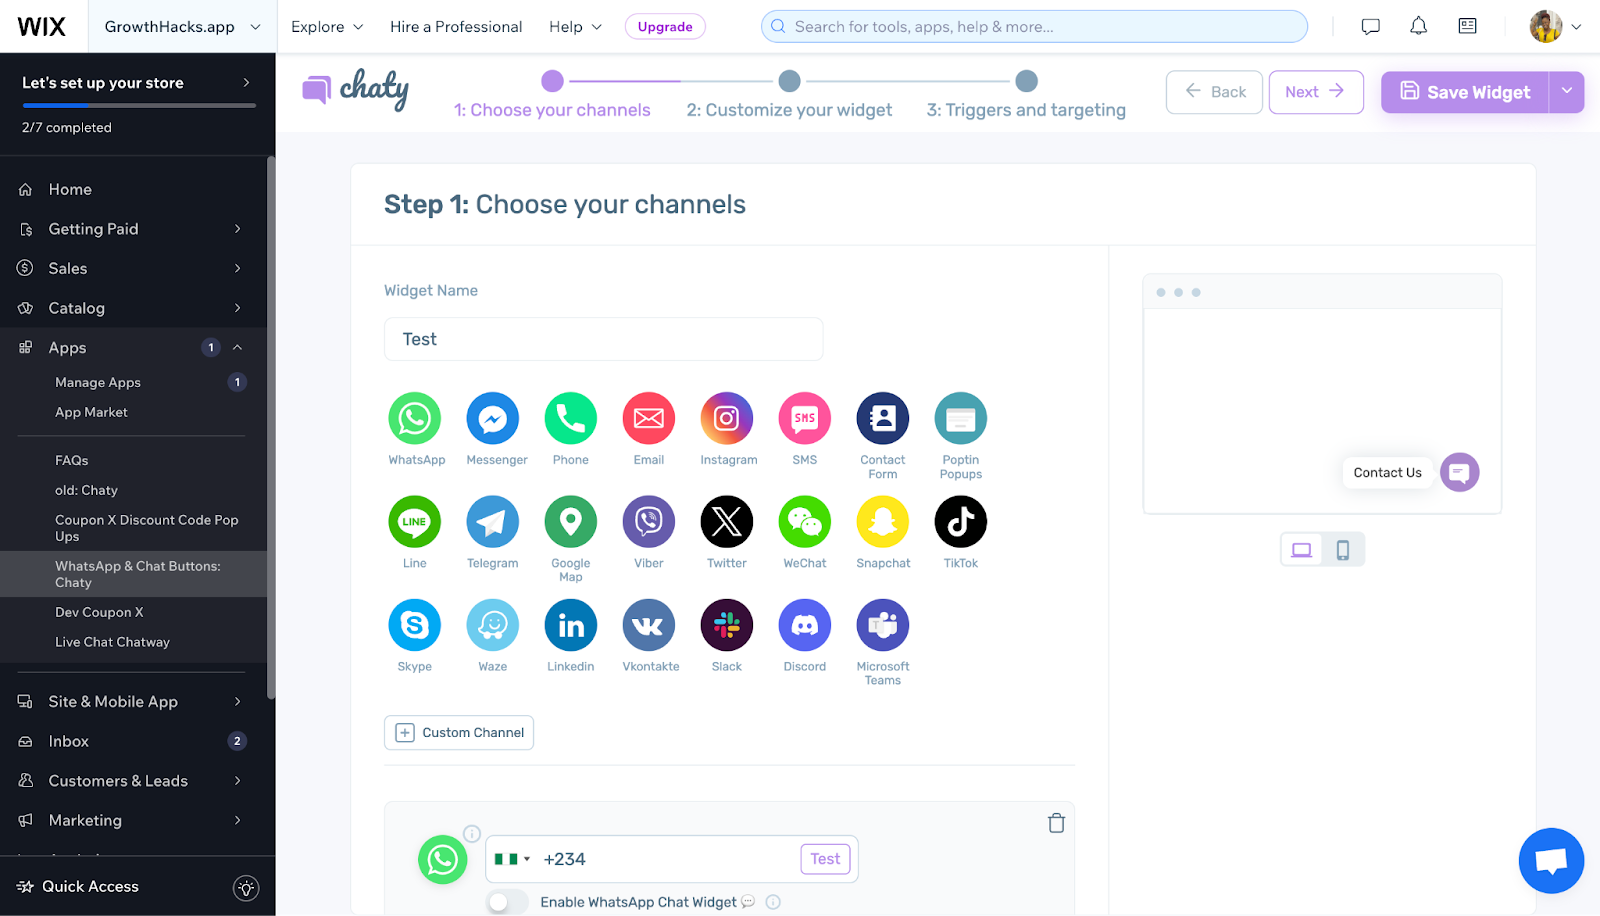
Here’s where you choose how visitors can connect with you. The beauty of Chaty is its versatility. Unlike some chat apps that limit you to a single platform, Chaty lets you offer a variety of channels all through one widget.
To select your channels, simply click on “New Widget”, enter the details of your widget and you’ll be redirected to “choose your channels”. The interface is designed to be user-friendly, so finding the channels section shouldn’t be difficult.
Once you’re there, you’ll see a list of all the communication channels that Chaty supports. This includes popular options like WhatsApp, Facebook Messenger, Telegram, and even SMS text messages. You’ll also likely see more traditional channels like email and phone calls.
Once you’ve selected your channels, you can personalize them further. Here are some ways to make each option your own:
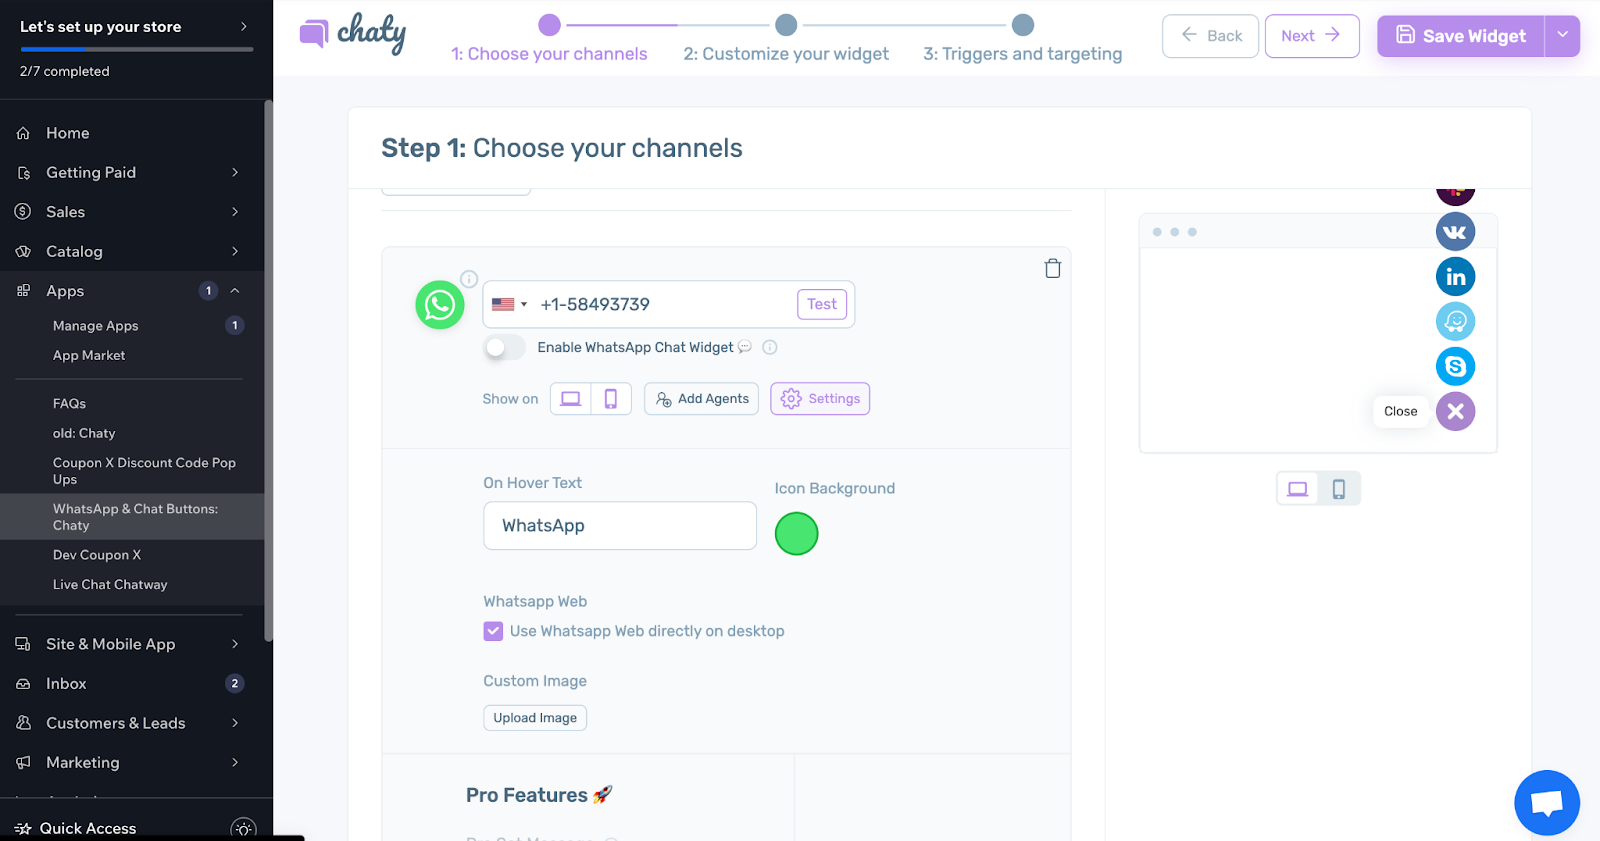
Add multiple agents: If you have a team managing your chats, you can add them as agents within each channel. This ensures whoever is available can jump in and assist visitors.
Show widget on website or mobile devices: Decide where you want your chat widget to appear. You can choose to display it on your website, mobile site, or both!
Upload a custom image: Upload a custom image to represent your brand within the chat widget. You can also customize the icon background color to match your website’s theme.
Customize icon background: You can change the background color to match your website’s theme or create a more eye-catching design.
Next, Customize your Chat Widget
Now that you’ve chosen which chat channels you want to offer, it’s time to customize the look and feel of your chat widget. This will ensure it seamlessly integrates with your website’s design and provides a clear call to action for visitors.

There are many options for customizing your widget at this stage. Firstly, you can select between two popup message designs – simple view or chat view.
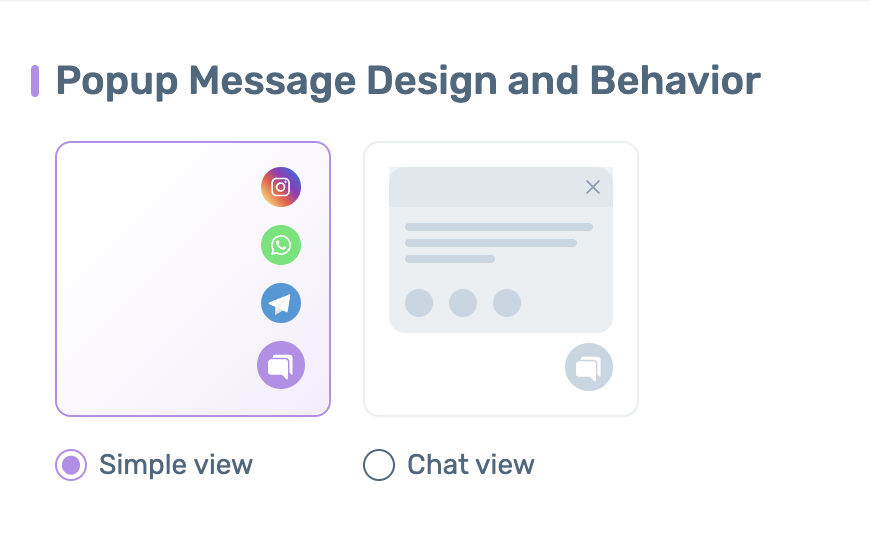
Both views allow you to display as many widgets as you wish but the chat view provides an opportunity for you to add custom URL tags which can be useful for understanding what pages your customers were on before they initiated the chat.
Also, you can customize the following:
Widget Position: Strategically place your chat widget for maximum visibility. Choose from displaying it on the left, or right side of your website.
Icon View (Horizontal or Vertical): Decide how you want your chat channel icons to be arranged. A horizontal layout works well for showcasing multiple channels, while a vertical layout can save space.
Attention Effects: Grab visitors’ attention with eye-catching animations when the chat widget appears. This can help increase engagement.
Pending Message: Let visitors know what to expect if they initiate a chat outside of your business hours. You can set a custom message to display.
Font Selection: Maintain brand consistency by choosing a font that matches your website’s overall design.
Call to Action Text (Optional): Add a clear and concise call to action text next to your chat widget, encouraging visitors to initiate a conversation.
Appearance Frequency: Control how often the chat widget appears to visitors. You can choose to display it only once per visit or set a specific time interval.
Custom CSS: For advanced users, Chaty allows you to further customize the widget’s appearance using custom CSS code.
Google Analytics Integration: Connect your Chaty widget to Google Analytics to track visitor interactions and gain valuable insights into how they use your chat functionality.
Lastly, Set Triggers and Targeting Rules
Now that your chat button is looking sharp, let’s control when and where it appears on your website. Chaty offers two powerful features to achieve this: Triggers and Targeting Rules.
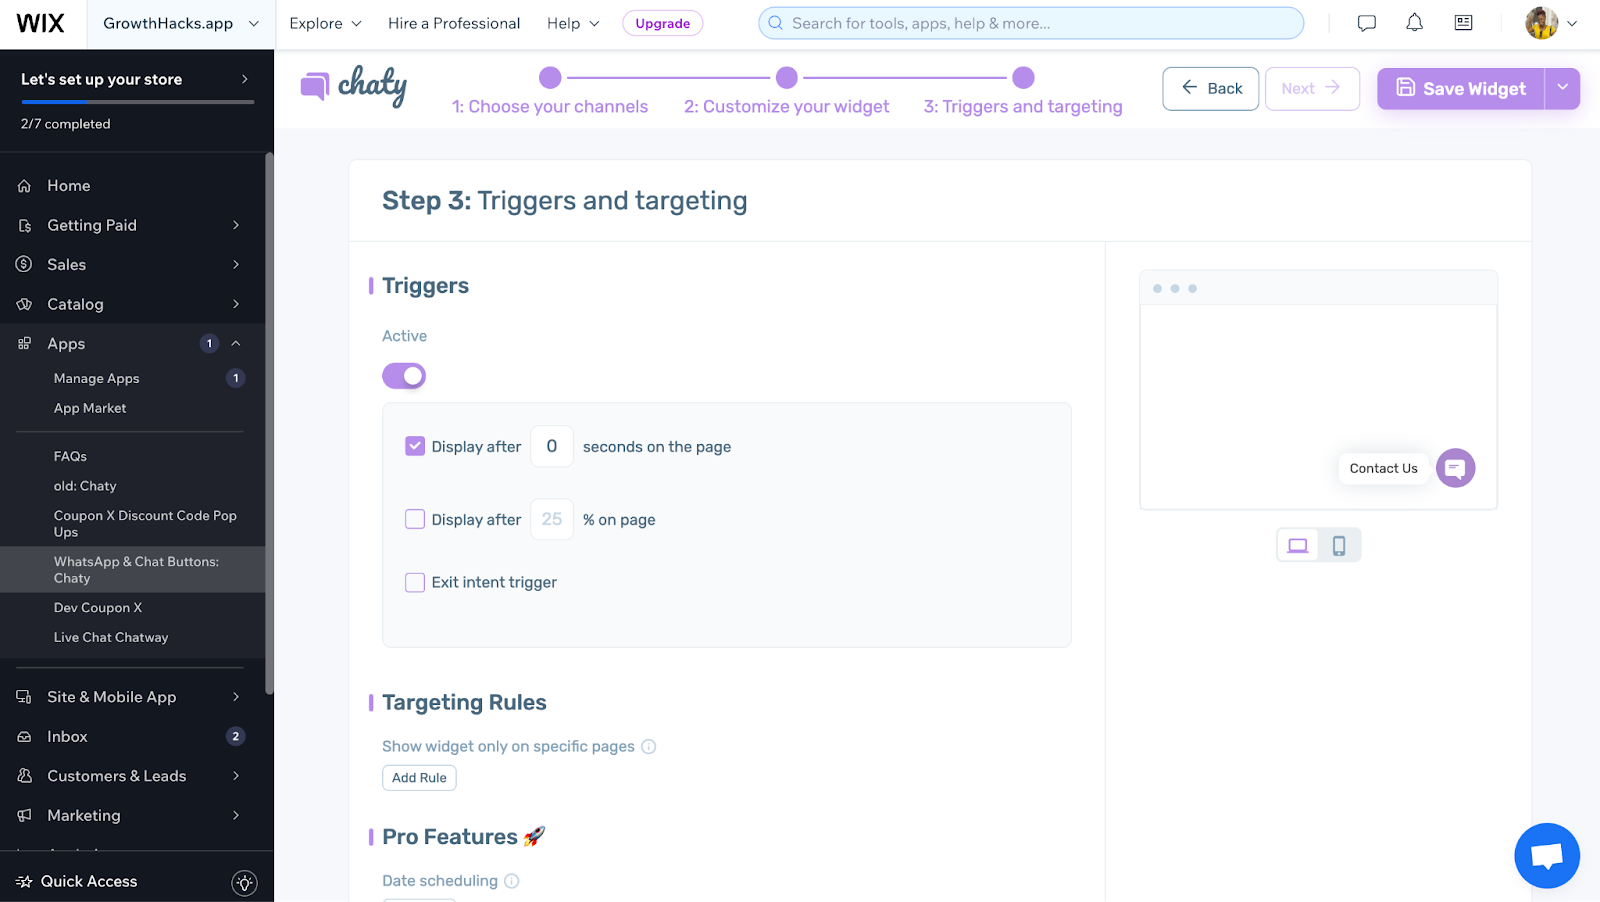
Triggers: These determine what prompts the chat button to appear for your visitors. Here are some options to consider:
- Time-delay: This shows the chat button after a set amount of time a visitor spends on your site. Great for sparking engagement when visitors seem interested.
- Exit intent: This detects when a visitor moves their mouse cursor towards the top of the window, indicating they might be leaving. A well-timed chat button can recapture their interest.
- Percentage on page: This displays the chat button when a visitor scrolls down to a specific point on your page, ensuring they’ve had a chance to see your content before initiating a chat.
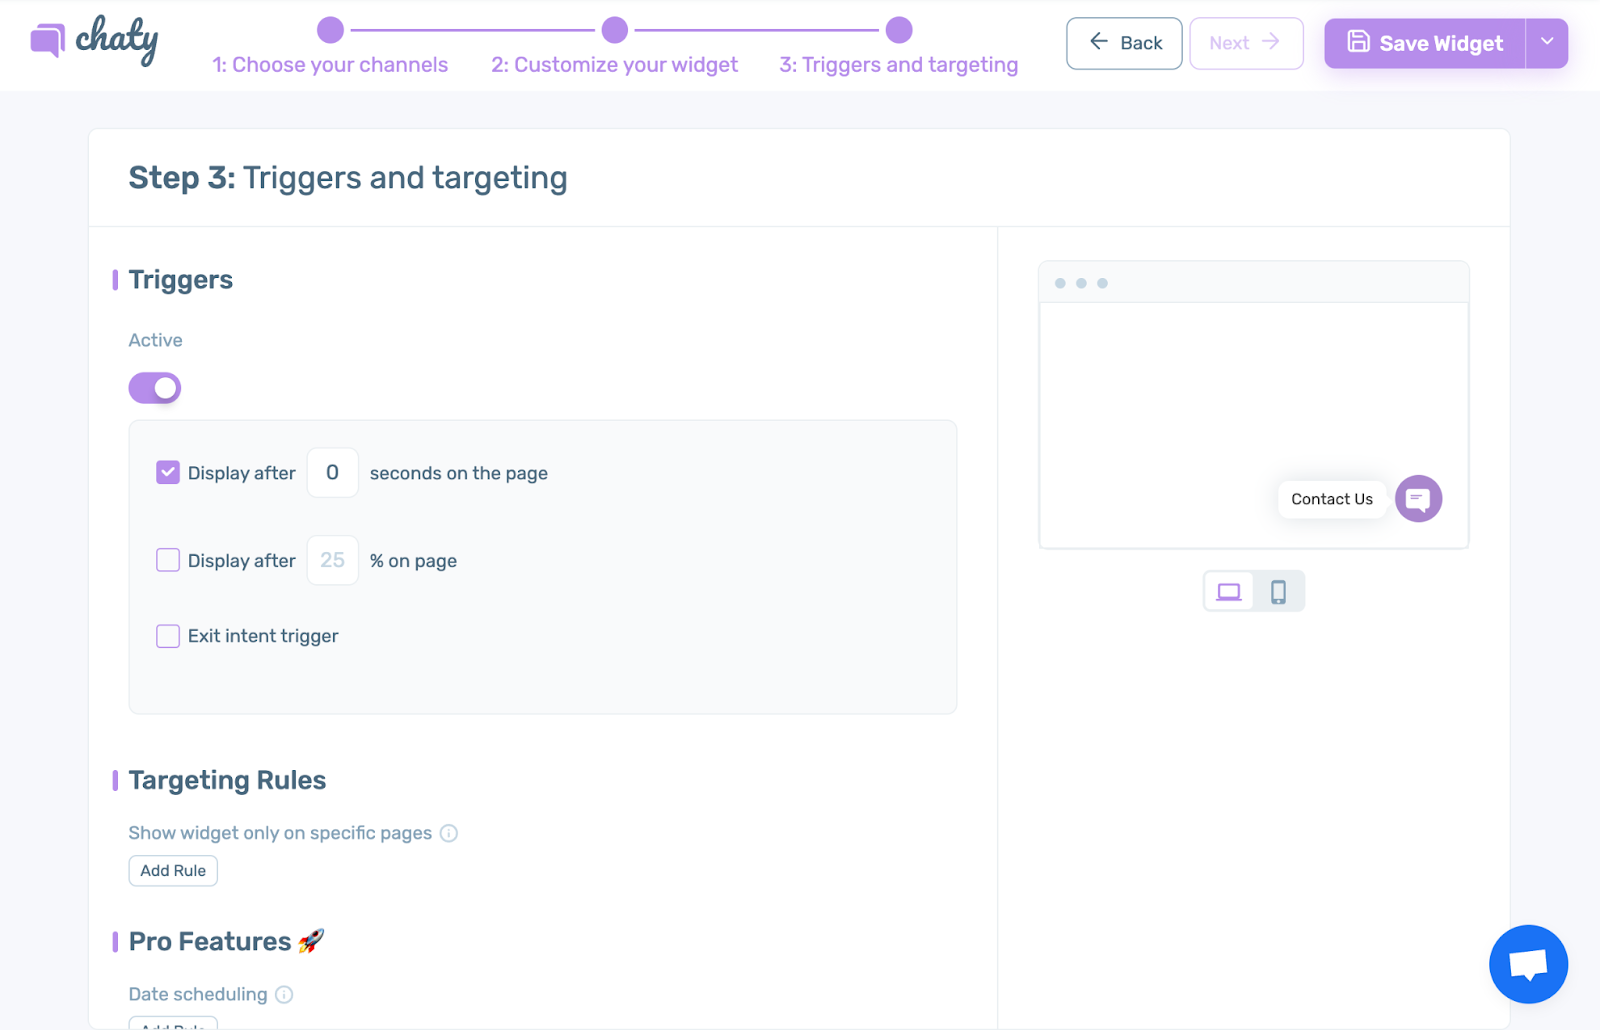
Targeting rules: This lets you define exactly where and when the chat button shows up. Here’s how you can use them:
- Show on specific pages: Limit the chat button to the most relevant pages on your site, like your contact or product pages.
- Date, days & hours: Control when the chat button is visible. You can choose specific dates, days of the week, and even certain times of the day to optimize for peak visitor hours.
- Traffic source: Target the chat button based on how visitors arrive at your site. This lets you tailor your chat experience for visitors coming from social media campaigns or organic search.
- Country: If you cater to a specific region, you can display the chat button only for visitors from those countries.
Please note that most of these targeting rules can only be accessed with a paid plan.
Step #6 – Save Your Widget
Once, your targeting rules have been defined, your widget is ready to go live. Simply save it and head over to your website to see it live in action.
Final Thoughts
After you publish your widget, don’t forget to track and measure its success. This will help you determine what channels are working best and which ones aren’t doing so well. With this data, you can refine your efforts and work towards increasing your sales.